2x4 Workbench Plans: A Sturdy DIY Workbench With a Shelf
By Woodworking Nest Editors · Updated
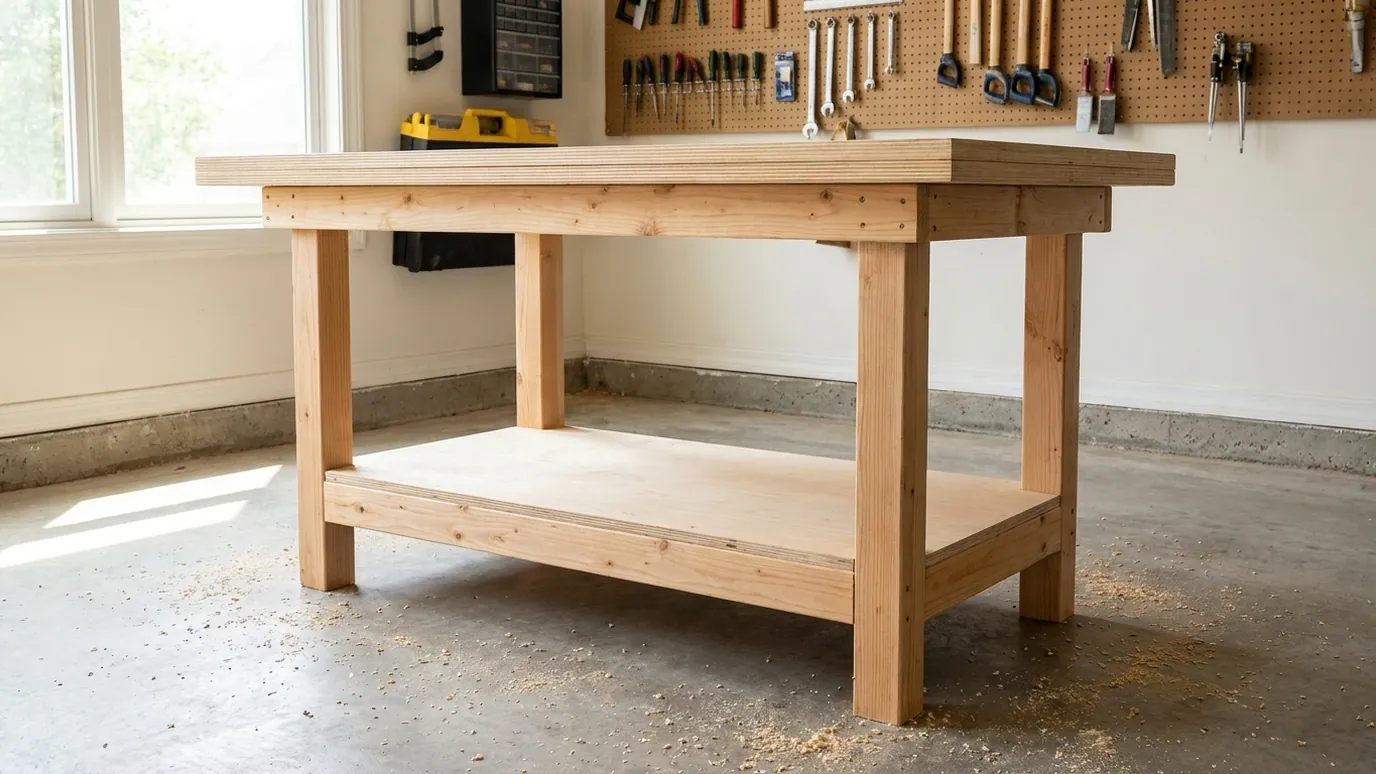
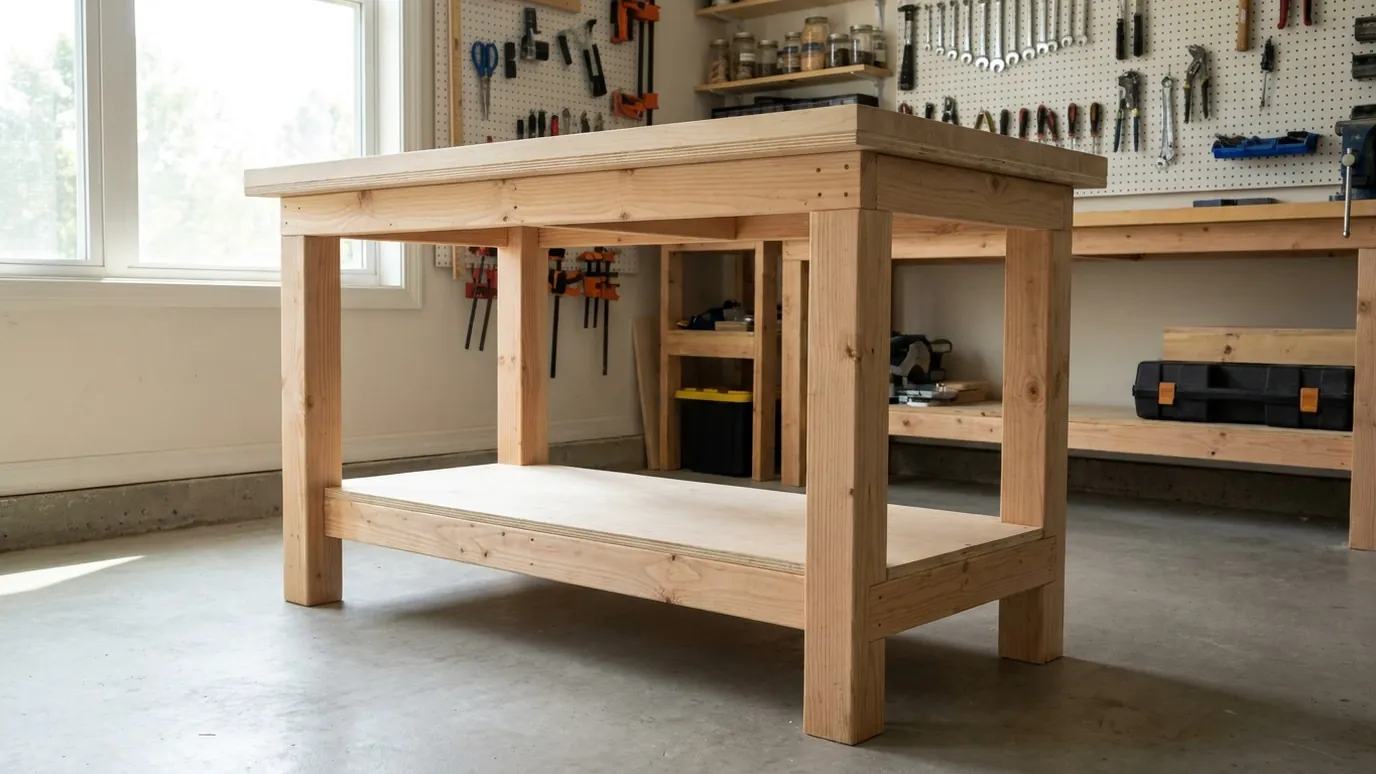
These free workbench plans build a 60 in long, 36 in tall 2x4 workbench with a lower shelf. You need five 8 ft 2x4s, one sheet of 3/4 in plywood, a saw, a drill and a pocket hole jig. It goes together in five steps, with an overhanging top you can clamp to.
Almost every project gets easier once you have a solid place to work, which is why a workbench is usually the first thing people build for a garage or shed. These 2x4 workbench plans are deliberately plain. The design uses two rectangular 2x4 frames, one near the floor and one under the top, and ties them together with a plywood shelf. That shelf does more than hold tools: screwed down to the lower frame, it stiffens the whole base against racking.
The top is two layers of 3/4 in plywood glued together, so you get a flat, 1 1/2 in thick surface that stays put when you hammer on it. It overhangs the frame by 3 in at each end and about 1 3/8 in at the front and back, which leaves room for clamps. If you are still putting your tool kit together, this is also one of our easiest beginner woodworking projects: the only joinery is pocket screws, which makes it a good first lesson in how to build a workbench that stays square.
- Difficulty
- Beginner
- Build time
- About 4–6 hours (estimate)
- Finished size
- 60 × 23 3/4 × 36 in
1524 × 603 × 914 mm - Lumber
- 2x4 lumber and 3/4 in plywood
- Cost
- 5 2x4s, 1 sheet of plywood, screws and glue — check local prices
- PDF plans
- Coming soon
Dimensions
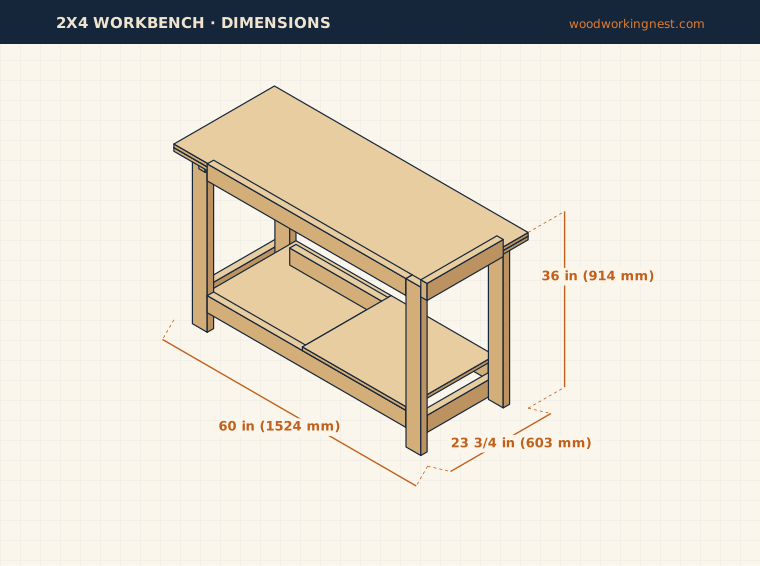
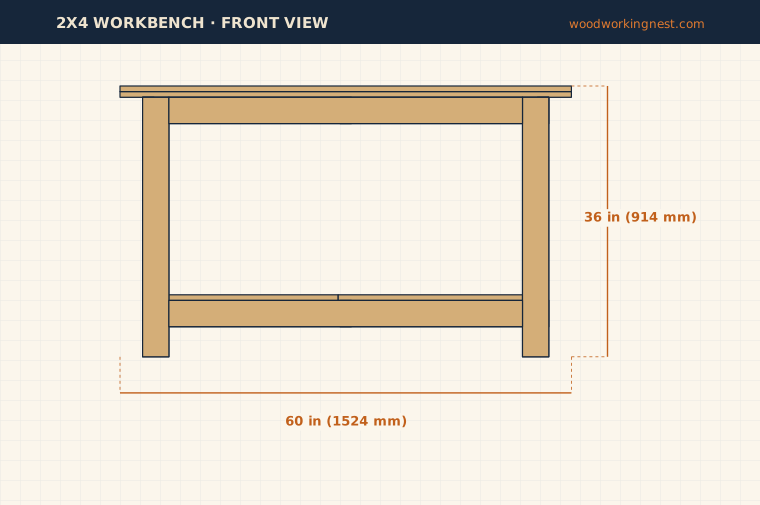
The bench is 60 in (1524 mm) long, 23 3/4 in (603 mm) deep and 36 in (914 mm) tall. That height suits most people for general work, but it is easy to change: the legs are the only parts that set the height, so cutting them 1 in shorter gives you a 35 in bench. Stand with your arms relaxed and measure from the floor to your wrist if you want a starting point. The 23 3/4 in depth is not a typo; a sheet of plywood ripped down the middle gives two pieces a little under 24 in once you lose the saw kerf, so the plan uses that real size.
Materials (shopping list)
Pick the straightest 2x4s in the pile. Sight down each board from one end; a slight bow is fine, but skip any that twist like a propeller, because a twisted leg will rock no matter how carefully you assemble it. One 4 × 8 ft sheet of 3/4 in plywood covers both top layers and the shelf. Sanded or cabinet-grade plywood gives a smoother top, but construction plywood works if you plan to cover the top with hardboard later. In the UK, use 38 × 89 mm CLS or regularised timber and 18 mm plywood; in Australia, 90 × 35 mm structural pine and 17 or 18 mm plywood. If you change the length, the board foot calculator helps you work out how much lumber to buy.
| Material | Qty | Size | Notes |
|---|---|---|---|
| 2x4 lumber | 5 | 8 ft (2.4 m) | Buy one extra in case a board is twisted |
| Plywood | 1 sheet | 3/4 in × 4 × 8 ft (18 mm × 1220 × 2440 mm) | Both top layers and the shelf |
| Pocket hole screws | about 50 | 2 1/2 in coarse thread | For 1 1/2 in thick 2x4 joints |
| Wood screws | about 60 | 1 1/4 in | Shelf and top layers |
| Wood glue | 1 bottle | 8 oz or larger | Frame joints and between the top layers |
Cut list
Cut the 2x4 parts first. Each 8 ft board can give you two long aprons, or two legs plus one end stretcher, or four 18 in pieces, so five boards are enough if you cut in that order. Square up one end of every board before you measure, because lumber rarely comes with clean ends. Cut the three 18 in parts and the four legs from the same setup each time, using a stop block on your miter saw, so matching parts come out exactly the same length. For the plywood, rip the sheet into two strips down the middle, cut a 60 in top panel from each strip, then cut the two shelf panels from what is left.
| Part | Qty | Length | Width | Thickness | Material |
|---|---|---|---|---|---|
| Leg | 4 | 34 1/2 (876 mm) | 3 1/2 (89 mm) | 1 1/2 (38 mm) | 2x4 |
| Long apron | 4 | 47 (1194 mm) | 3 1/2 (89 mm) | 1 1/2 (38 mm) | 2x4 |
| End stretcher | 4 | 18 (457 mm) | 3 1/2 (89 mm) | 1 1/2 (38 mm) | 2x4 |
| Center support | 2 | 18 (457 mm) | 3 1/2 (89 mm) | 1 1/2 (38 mm) | 2x4 |
| Top panel | 2 | 60 (1524 mm) | 23 3/4 (603 mm) | 3/4 (19 mm) | 3/4 in plywood |
| Shelf panel | 1 | 24 1/2 (622 mm) | 21 (533 mm) | 3/4 (19 mm) | 3/4 in plywood |
| Shelf panel | 1 | 22 1/2 (572 mm) | 21 (533 mm) | 3/4 (19 mm) | 3/4 in plywood |
Tools
Like most simple workbench plans, this one needs only basic tools. A miter saw makes the 2x4 cuts quick and square, but a circular saw with a speed square works just as well. You will want a way to cut plywood straight: a track saw, a circular saw run along a clamped straightedge, or the store's panel saw if they offer cuts. A pocket hole jig set for 1 1/2 in material is what holds the frames together.
Essential: Tape measure, Miter saw, Drill/driver, Pocket hole jig, Clamps, Safety glasses, Speed square
Optional: Random orbit sander, Track saw or straightedge guide
Step-by-step instructions
Step 1: Build the two end frames
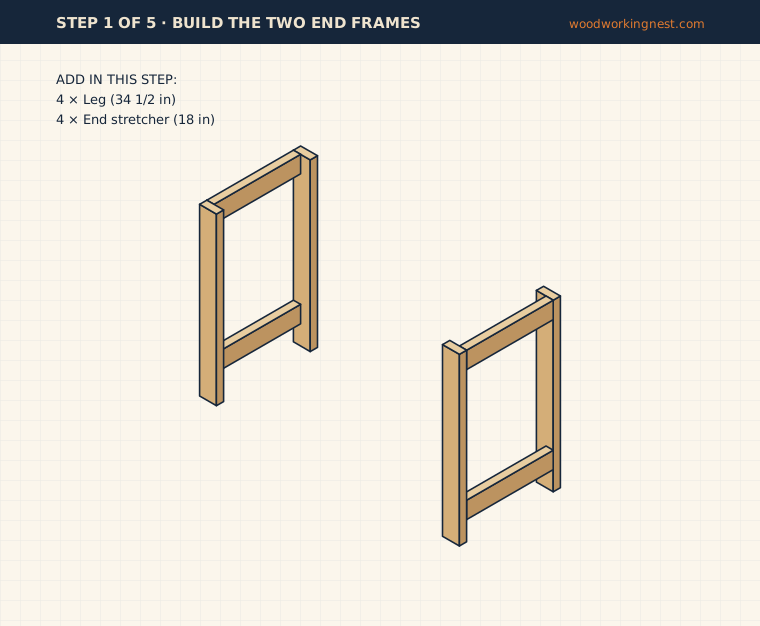
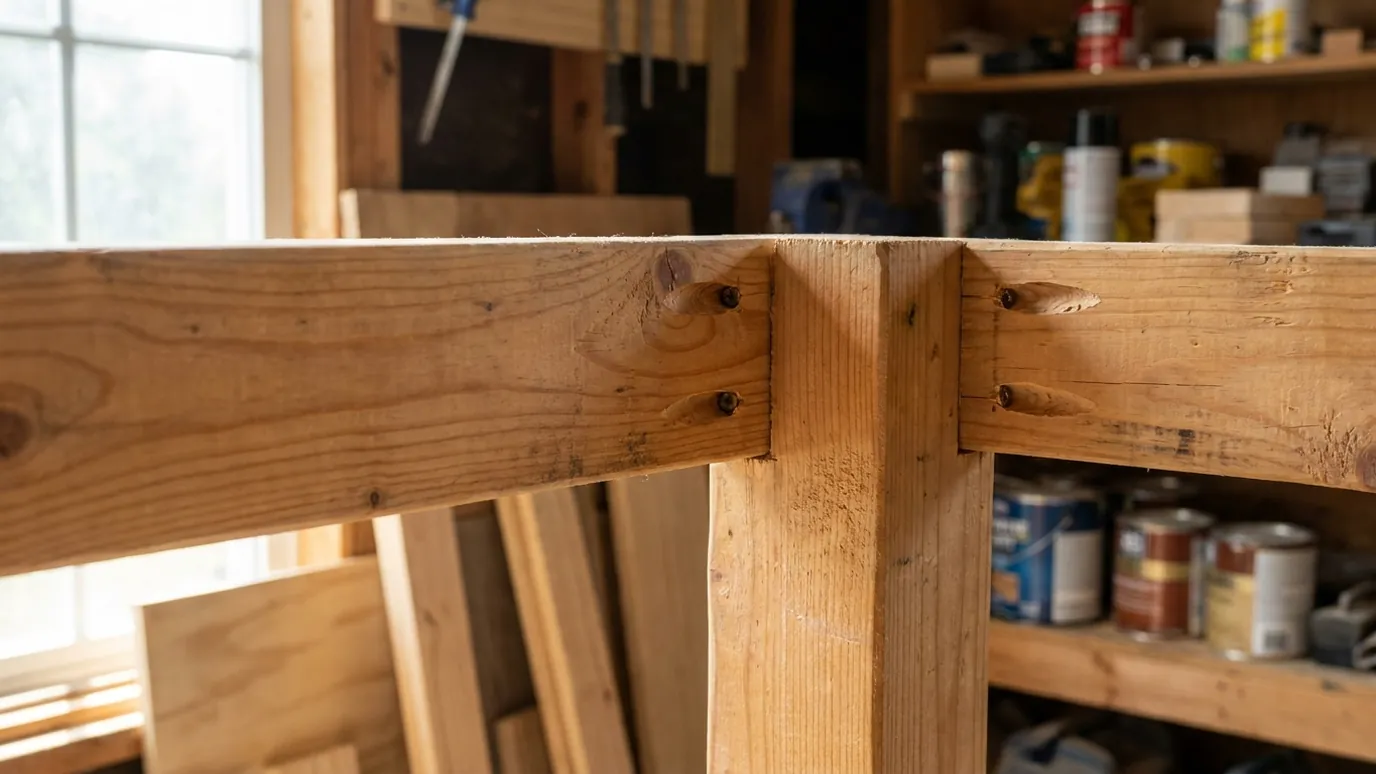
Drill two pocket holes in each end of the four end stretchers, set for 1 1/2 in thick stock. Lay two legs on a flat floor, 21 in apart measured across their outside faces, and fit one end stretcher between them flush with the tops of the legs. Fit the second stretcher 4 in up from the bottom of the legs; a 4 in scrap block makes a quick spacer. Add glue to the joints and drive 2 1/2 in pocket screws.
Before the glue grabs, measure each frame corner to corner both ways. If the two diagonals match, the frame is square; if not, push the long diagonal gently until they do. Build the second end frame the same way, with the pocket holes facing inward on both so they end up hidden inside the bench.
Tip: Keep the pocket holes on the inside face of each frame, where nobody will see them.
Step 2: Join the end frames with the long aprons
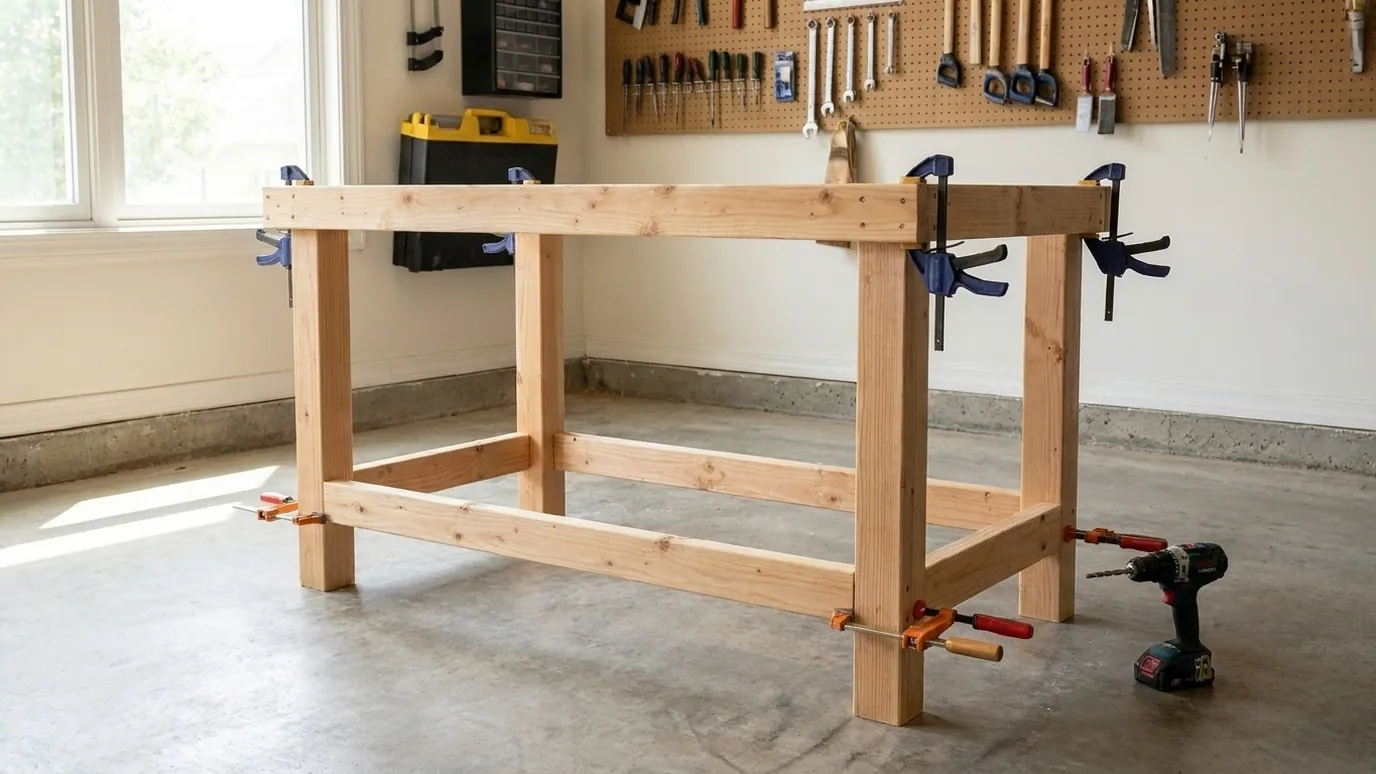
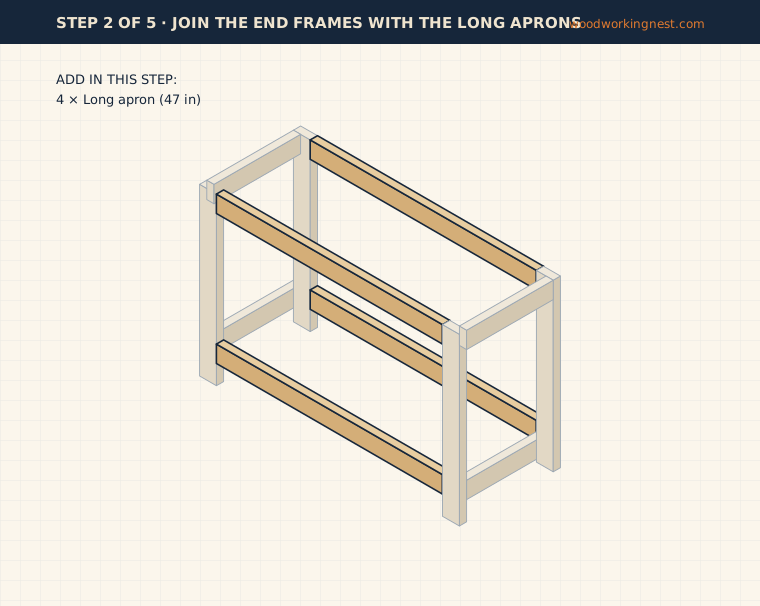
Drill pocket holes in both ends of the four long aprons. Stand the end frames up about 47 in apart and set one apron between them at the top, front edge flush with the front of the legs. Clamp it, check that the frame is still square, and drive the pocket screws into the legs. Add the back top apron the same way, then the two lower aprons, which line up with the lower end stretchers.
This is the step where a bench either sits flat or rocks, so work on the flattest part of your floor. Once all four aprons are on, measure the top of the base corner to corner. Matching diagonals mean the base is square and the top will drop on cleanly.
Tip: If the base rocks, find the high leg and plane or sand a little off its bottom, rather than shimming.
Step 3: Add the center supports
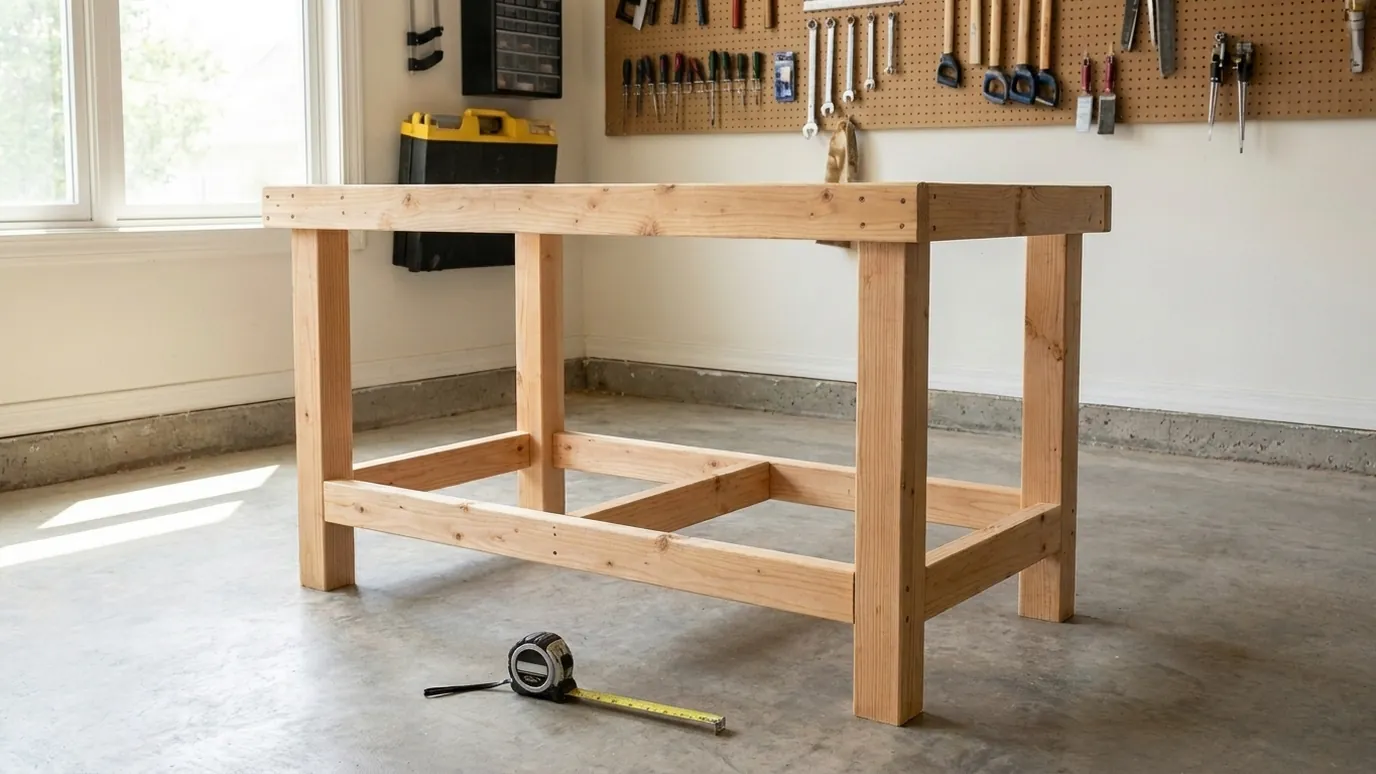
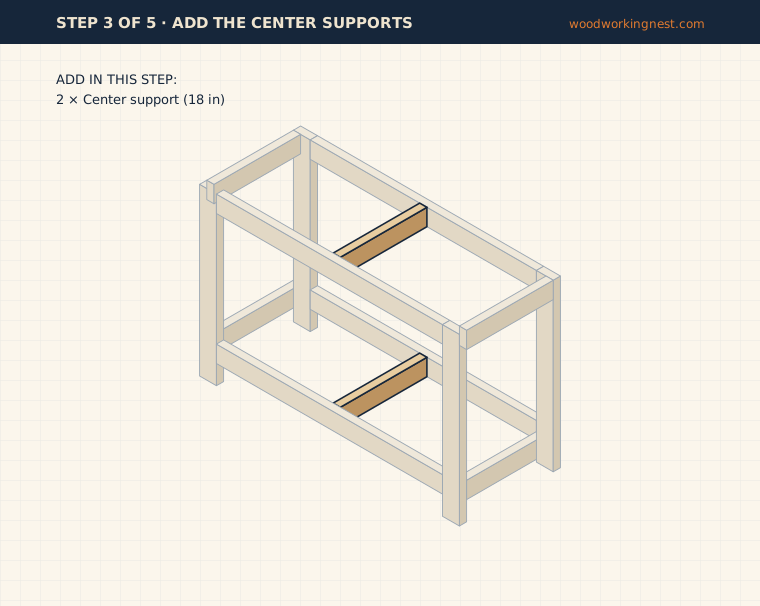
The two center supports stop the top and the shelf from sagging in the middle of their 47 in span. Mark the center of each long apron, 30 in from either end of the finished bench, which puts the support between the front and back aprons at the midpoint. Drill pocket holes in both ends of each support, set it on edge between the aprons at the top and at the bottom, and screw it in place with the top edge flush with the aprons.
Check that each support sits level with the aprons on either side; a support that sticks up will lift the plywood and make the top uneven. Run your hand across the joint, and sand or plane it flush if needed.
Step 4: Fit the lower shelf
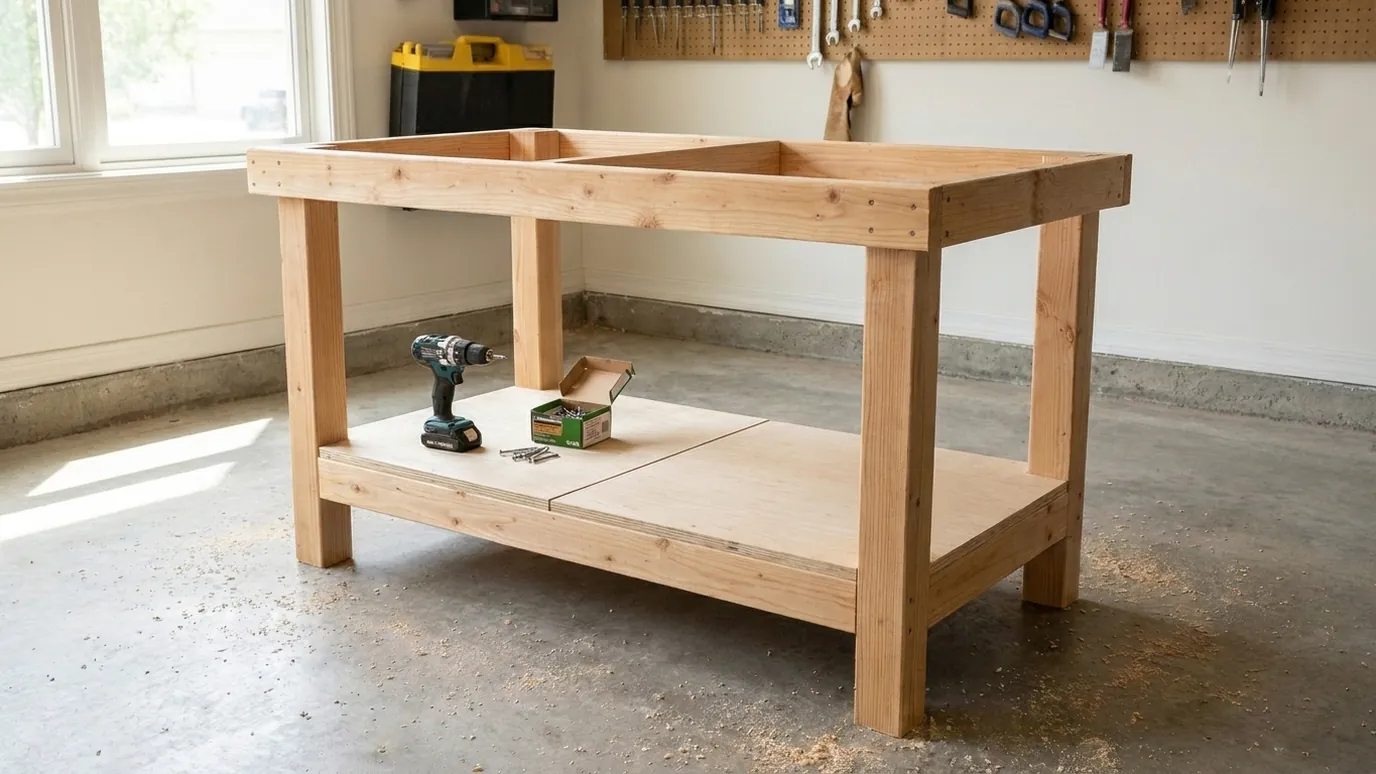
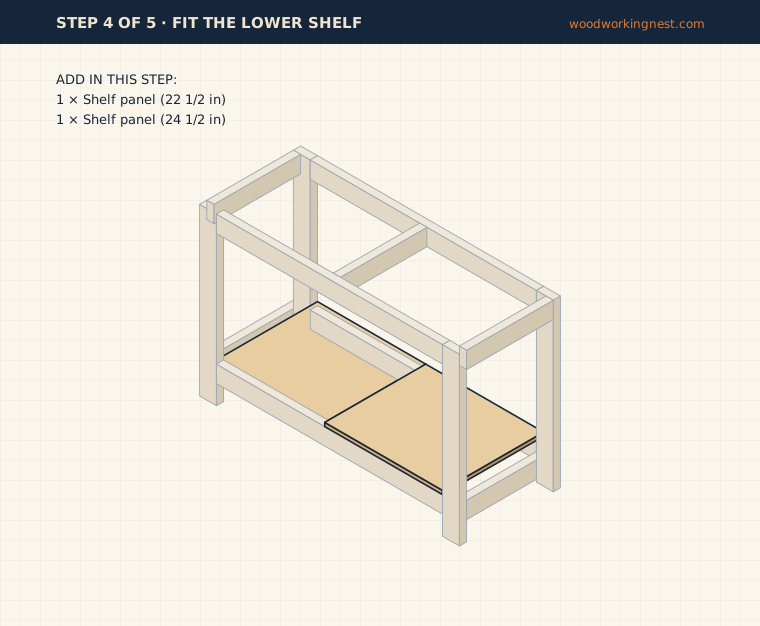
The shelf is made from two plywood panels because they come out of the offcuts left after cutting the top, so one sheet covers the whole bench. Set the 24 1/2 in panel on the lower frame from the right end and the 22 1/2 in panel from the left end; their seam lands on the lower center support, so both edges are supported.
Push each panel against the legs, then fix it down with glue and 1 1/4 in wood screws about every 8 in into the aprons, end stretchers and center support. Screwed down like this, the shelf works as a brace: it keeps the lower frame from twisting, which is what makes the whole bench feel solid rather than wobbly.
Tip: Drill small pilot holes near the panel edges so the plywood does not split.
Step 5: Attach the two-layer top
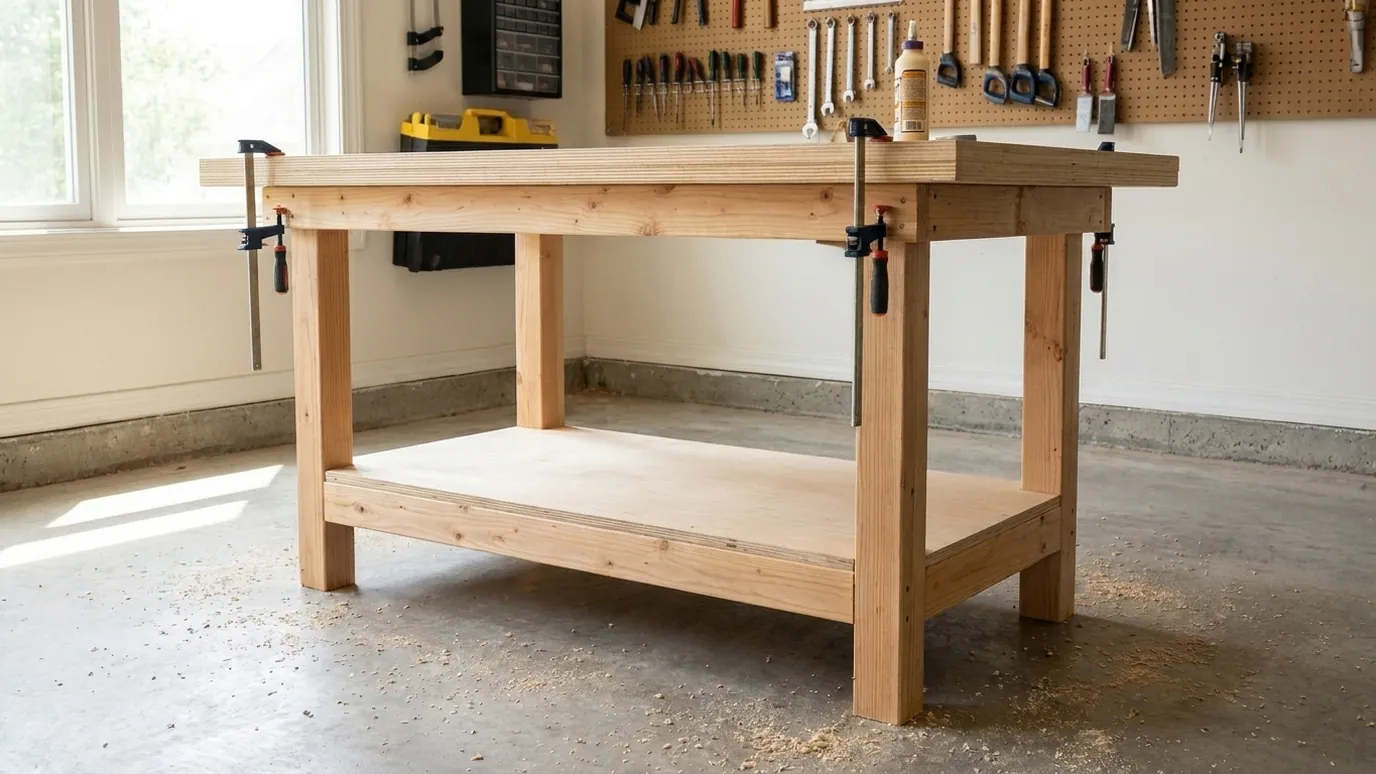
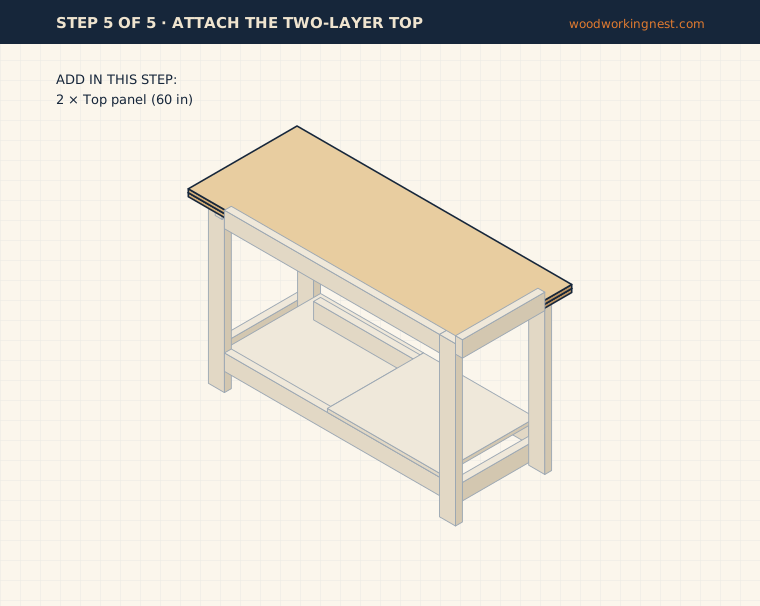
Lay the first top panel on the base so it overhangs 3 in at each end and evenly at the front and back. Screw it to the upper aprons, end stretchers and center support with 1 1/4 in screws, countersunk slightly below the surface, about every 8 in. Spread wood glue over the whole panel with a notched spreader or a scrap of cardboard, set the second panel on top with its edges lined up, and screw it down from below through the first layer so the working surface stays free of screw heads.
Keep weight on the top while the glue dries; a few buckets of screws or lumber spread across it are enough. Finally, ease every edge and corner with sandpaper so the top does not splinter or catch your sleeves.
Tip: Stagger the screws from the first layer so the second-layer screws do not hit them.
Safety: Plywood is heavy and awkward; get a second person to help lift and place both top panels.
Finishing
A garage workbench does not need much finish, and a slick finish can make work slide around. Sand the top to 120 grit and wipe on two thin coats of a penetrating oil or a wipe-on polyurethane; it keeps glue and paint drips from soaking in, and they pop off with a scraper. Leave the base bare or give it a quick coat to match. Many people add a 1/8 in hardboard sheet on top, held with a few finish nails at the edges, and replace it when it gets beaten up. Once the bench is done, the wall above it is the next thing to organize; our other workshop plans cover shop storage that pairs well with it.
Common mistakes to avoid
The most common problem is a bench that rocks, which nearly always comes from assembling on an uneven floor or using a twisted 2x4. Build on the flattest spot you have and check your diagonals at every step. The second is measuring each part separately with a tape: small errors add up, so cut matching parts against a stop block instead. Finally, do not skip the glue on the top layers. Without it, the two sheets can flex against each other and the top feels hollow under a hammer.
How to change the size
To make the bench longer, add the same amount to the long aprons and the top panels. For anything over about 72 in, add a second pair of center supports so the top and shelf stay flat. To make it lower or higher, change only the four legs. To turn these DIY workbench plans into a mobile workbench, add four locking swivel casters rated for the weight you plan to put on it, and shorten the legs by the height of the casters so the top stays at 36 in. For a narrow garage, the depth can drop to about 20 in by shortening the end stretchers and center supports by the same amount and cutting the top panels to match.
Finished 2x4 workbench photos
Safety
Wear safety glasses for every cut and hearing protection when using a circular or miter saw. Support long boards on both sides of the blade so the offcut does not pinch it. Clamp plywood firmly before cutting, and never cut a board you are holding in your hand. These plans do not include a load rating; the bench is designed for ordinary workshop use. Read our woodworking safety guide before you start.
Frequently asked questions
How tall should a workbench be?
Most workbenches are 34–38 in (86–97 cm) tall. This plan is 36 in. A top at about wrist height, with your arms relaxed, suits general work; go a little higher for detailed work and a little lower for hand planing.
How much lumber do these workbench plans need?
Five 8 ft 2x4s and one 4 × 8 ft sheet of 3/4 in plywood. Buying one extra 2x4 is worth it in case a board turns out twisted.
Can I build this 2x4 workbench without a pocket hole jig?
Yes, but it takes more care. You can screw the aprons into the legs from the outside with 3 in construction screws, two per joint. Pocket screws keep the outside clean and pull the joints tight.
How much weight can this workbench hold?
We do not give a load rating, because it depends on your lumber and assembly. With glued pocket-screw joints, center supports and a two-layer top, it is built for ordinary workshop use such as assembly, hand tools and benchtop machines.
How do you build a workbench out of 2x4s?
Build two end frames from 2x4 legs and short stretchers, join them with long aprons at the top and bottom, add center supports, then screw on a plywood shelf and a plywood top. The steps above walk through each stage with a diagram.
Can I put a workbench on casters?
Yes. Use four locking swivel casters rated for more than the weight you will load on it, and shorten the legs by the caster height to keep the top at the same height.
Should a workbench top be plywood or solid wood?
Both work. Two glued layers of 3/4 in plywood, as in this plan, give a flat, stable top that does not move with the seasons. A laminated 2x4 or hardwood top is heavier and takes hammering better but needs flattening.
Related plans
More plans: all workshop plans · every free woodworking plan · board foot calculator
How this plan was made
This is a conceptual design: it was drawn from a full 3D part model and checked so the cut list, the diagrams and the finished size agree, but it has not yet been built and photographed by us. The joinery and sizes follow common, well-tested workbench practice.
Written by Woodworking Nest Editors. Measurements, the cut list and all diagrams come from one shared 3D part model, so they always agree. Photos marked “Illustrative render” were created with AI image tools to show the finished look; they are not photos of a real build. Status: Conceptual design. Found a mistake? Tell us and we will fix it (see our corrections policy).