2x4 Bench Plans: Simple DIY Bench for Indoors or Out
By Woodworking Nest Editors · Reviewed by Daniel Brooks · Updated
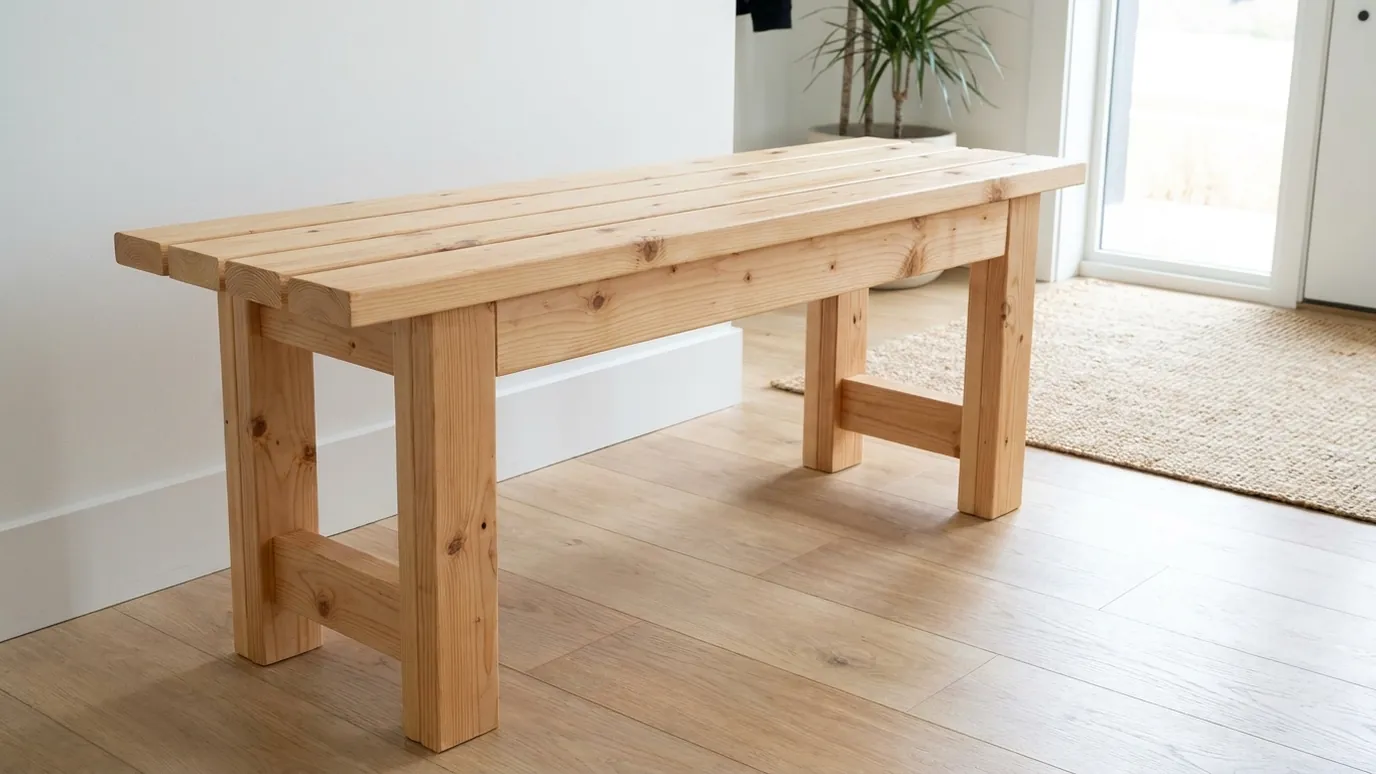
These 2x4 bench plans build a simple bench 47 1/2 in long, 14 3/4 in deep and 18 in tall, using only five 8 ft 2x4s and screws. It takes four steps: two end frames, two aprons, a center support and four seat boards with small gaps so rain drains through.
If you want one project that teaches the basics without a big lumber bill, a 2x4 bench is hard to beat. Every part is a straight crosscut, there is no plywood to wrestle, and the whole thing fits in the back of a hatchback before assembly. Finished, it works as an entryway bench for putting on shoes, a seat at the end of a bed, or extra seating on a patio.
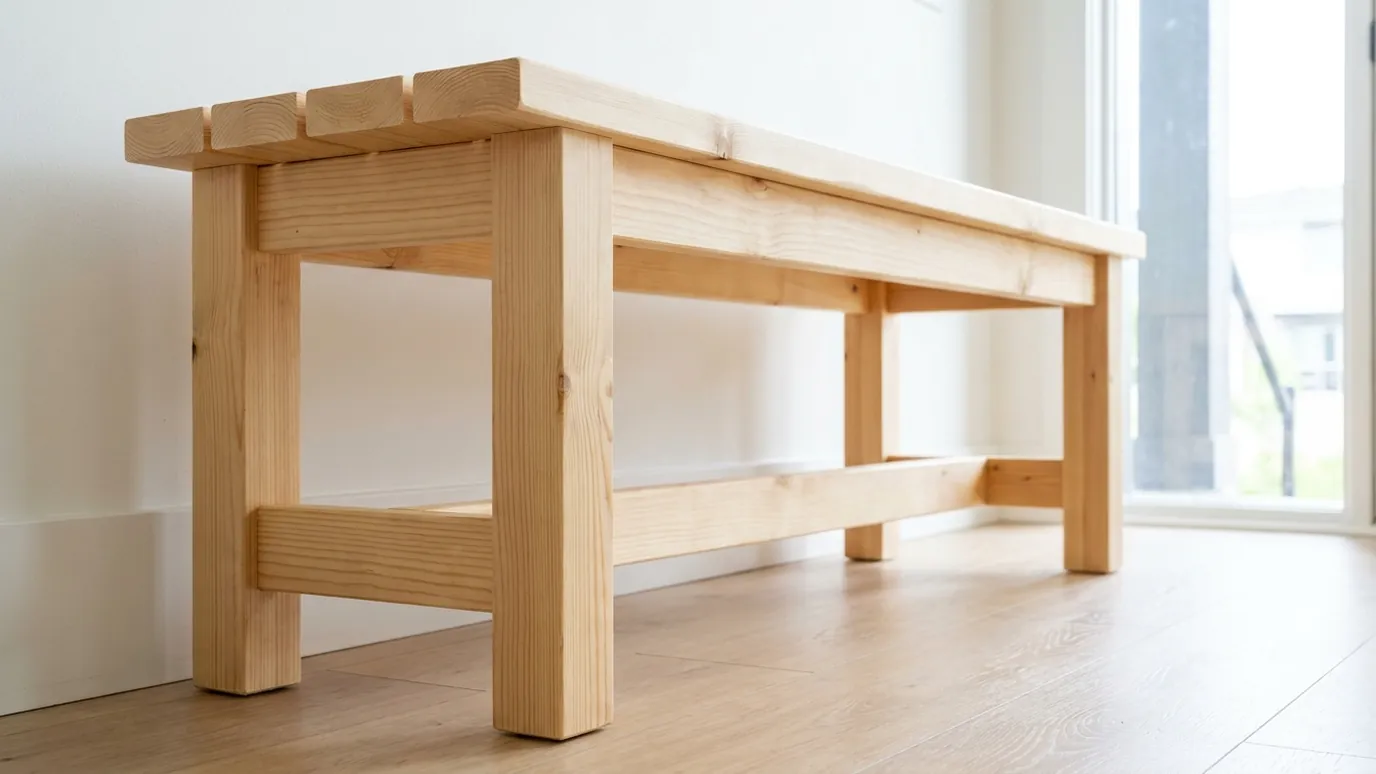
The design keeps the seat at a comfortable 18 in and leaves 2 in of overhang at each end, which makes the bench look lighter than a box on legs. A center support under the seat stops the middle boards from bouncing when someone sits down, and the lower stretchers on each end keep the legs from spreading. It is one of the easiest beginner woodworking projects on the site, and a good warm-up before something bigger like our 2x4 workbench.
- Difficulty
- Beginner
- Build time
- About 2–3 hours (estimate)
- Finished size
- 47 1/2 × 14 3/4 × 18 in
1207 × 375 × 457 mm - Lumber
- 2x4 lumber (pine, or cedar or treated pine outdoors)
- Cost
- Five 8 ft 2x4s and a box of screws — check local prices
- PDF plans
- Coming soon
Dimensions
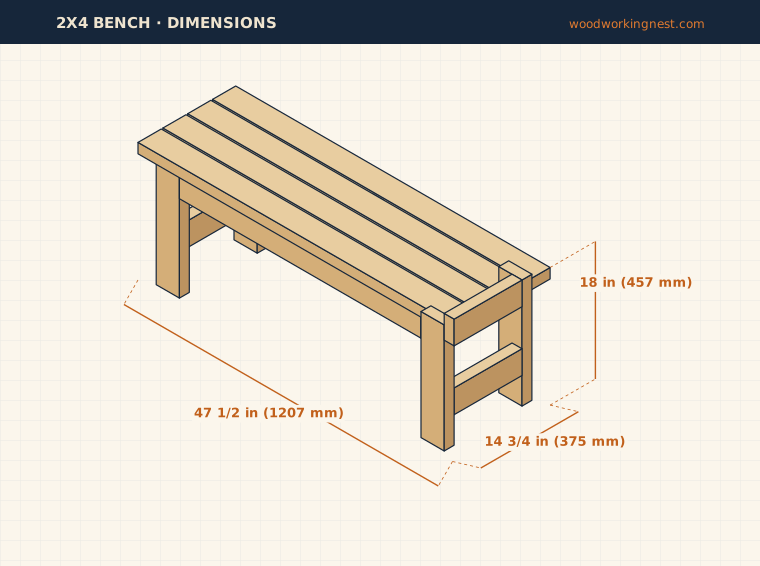
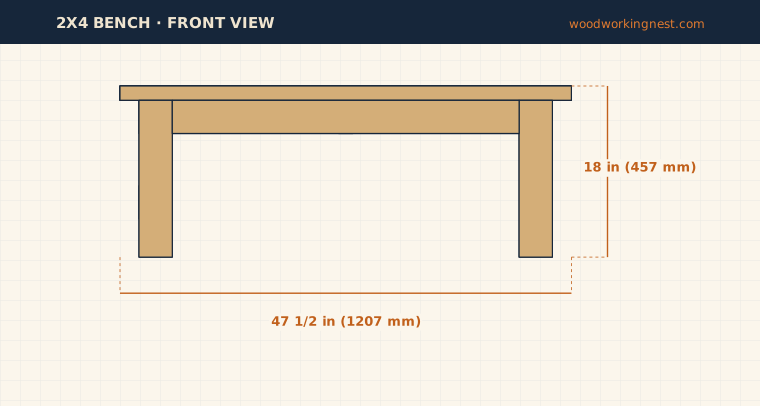
The finished bench is 47 1/2 in (1207 mm) long, 14 3/4 in (375 mm) deep and 18 in (457 mm) tall. Eighteen inches is a typical seat height, the same as most dining chairs, so it is easy to sit on and stand up from. The seat is four 2x4s laid flat with 1/4 in gaps; that is why the depth is 14 3/4 in rather than an even 14. The odd length is on purpose too: at 47 1/2 in, two seat boards fit in one 8 ft 2x4 with room for the saw blade, so nothing is wasted.
Materials (shopping list)
Indoors, ordinary pine or fir 2x4s are fine. For a bench that will live outside, use cedar or pressure-treated lumber, and pick boards that are dry and straight; wet treated lumber shrinks and can twist as it dries, so let it sit in the garage for a week or two if it feels heavy and damp. Whatever you buy, sight down each board and leave the twisted ones at the store. In the UK, use 38 × 89 mm CLS or treated sawn timber; in Australia, 90 × 35 mm pine, H3 treated for outdoor use.
| Material | Qty | Size | Notes |
|---|---|---|---|
| 2x4 lumber | 5 | 8 ft (2.4 m) | Cedar or treated pine for outdoor use |
| Pocket hole screws | about 30 | 2 1/2 in coarse thread | Exterior-rated if the bench lives outside |
| Exterior wood screws | about 24 | 2 1/2 in | For the seat boards |
| Wood glue | 1 small bottle | Exterior (waterproof) glue outdoors | For the frame joints |
Cut list
Start with the four seat boards, since they need the cleanest 2x4s you have: cut two 47 1/2 in pieces from each of two boards. Then cut the two aprons from a third board, plus two of the short end stretchers. The fourth board gives you all four legs and two more stretchers, and the fifth covers the last piece, the center support, with plenty left over for a test cut. Cut parts of the same length in one go using a stop block, so the two aprons and the five 10 1/4 in pieces match exactly.
| Part | Qty | Length | Width | Thickness | Material |
|---|---|---|---|---|---|
| Leg | 4 | 16 1/2 (419 mm) | 3 1/2 (89 mm) | 1 1/2 (38 mm) | 2x4 |
| End stretcher | 4 | 10 1/4 (260 mm) | 3 1/2 (89 mm) | 1 1/2 (38 mm) | 2x4 |
| Apron | 2 | 36 1/2 (927 mm) | 3 1/2 (89 mm) | 1 1/2 (38 mm) | 2x4 |
| Center support | 1 | 10 1/4 (260 mm) | 3 1/2 (89 mm) | 1 1/2 (38 mm) | 2x4 |
| Seat board | 4 | 47 1/2 (1207 mm) | 3 1/2 (89 mm) | 1 1/2 (38 mm) | 2x4 |
Tools
A miter saw makes this a fast build, but a circular saw and a speed square are all you really need for straight crosscuts. A pocket hole jig gives the cleanest joints. Without one, you can screw through the legs from the outside with 2 1/2 in exterior screws; the bench will be just as strong, you will simply see the screw heads.
Essential: Tape measure, Miter saw, Drill/driver, Clamps, Safety glasses, Speed square
Optional: Pocket hole jig, Random orbit sander
Step-by-step instructions
Step 1: Build the two end frames
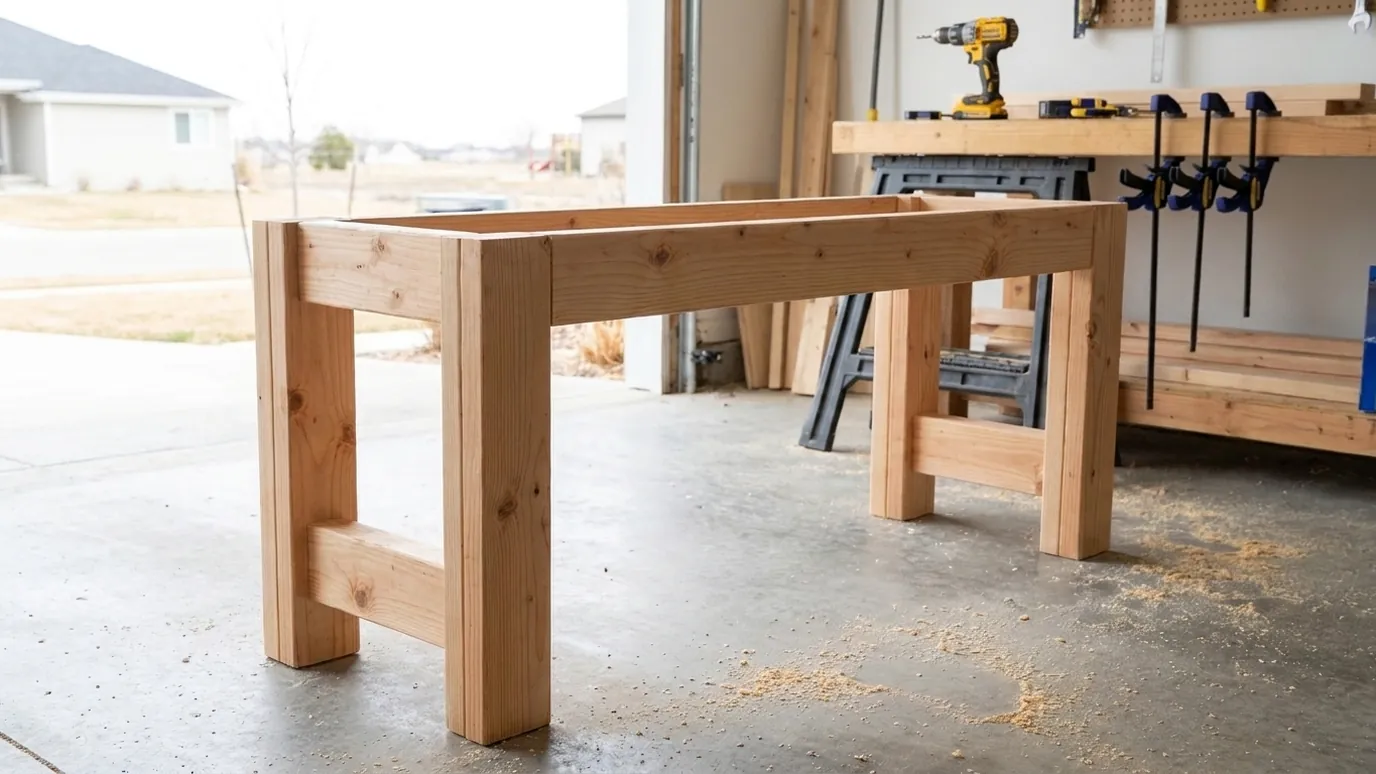
Drill two pocket holes in each end of the four end stretchers. Stand two legs on their narrow edges on a flat surface, wide faces toward each other, 13 1/4 in apart across the outside. Set one stretcher between them flush with the top of the legs and the other 4 in up from the bottom; a 4 in block keeps the spacing consistent from one frame to the next. Add glue and drive 2 1/2 in pocket screws.
Measure each frame corner to corner. If the two measurements match, it is square. Push gently on the longer diagonal until they do, then leave the frame flat while you build the second one the same way. Keep the pocket holes on the inside face so they end up hidden under the seat.
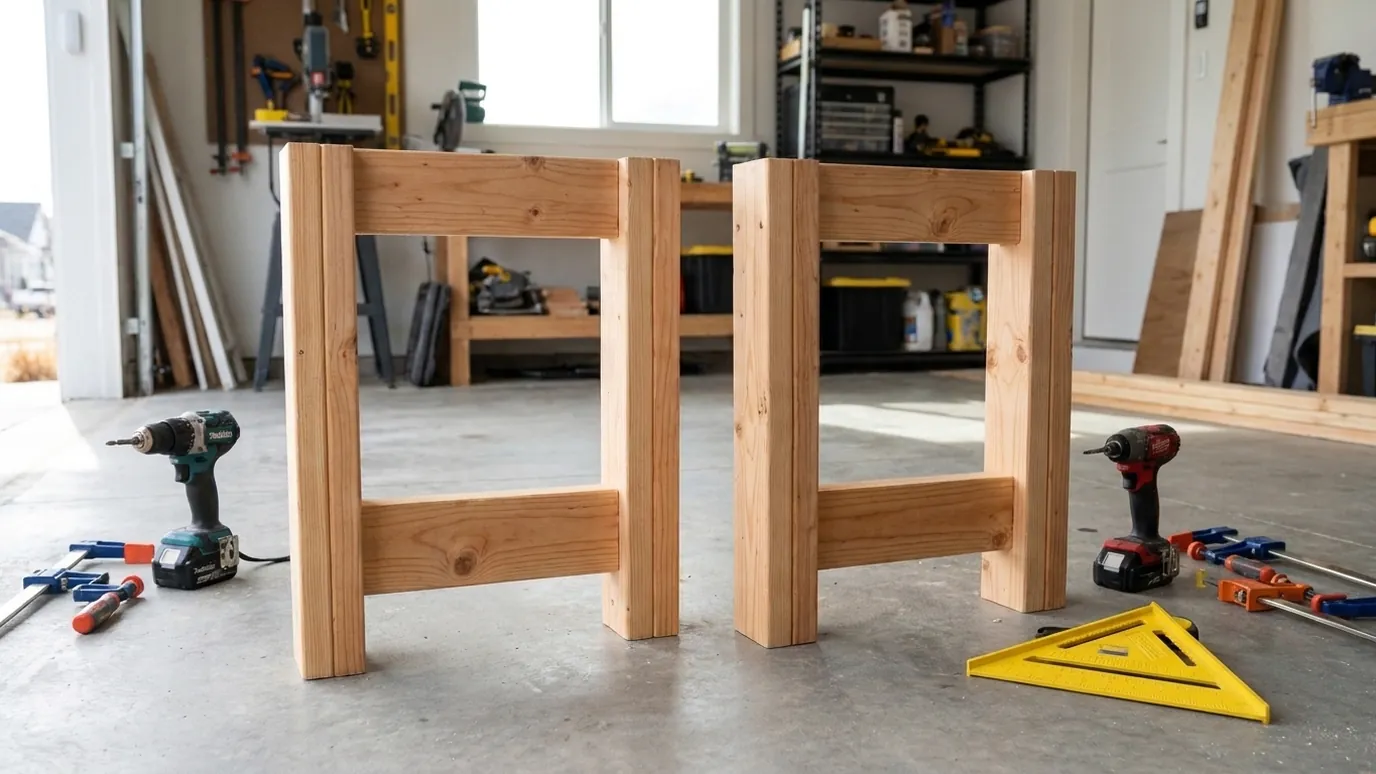
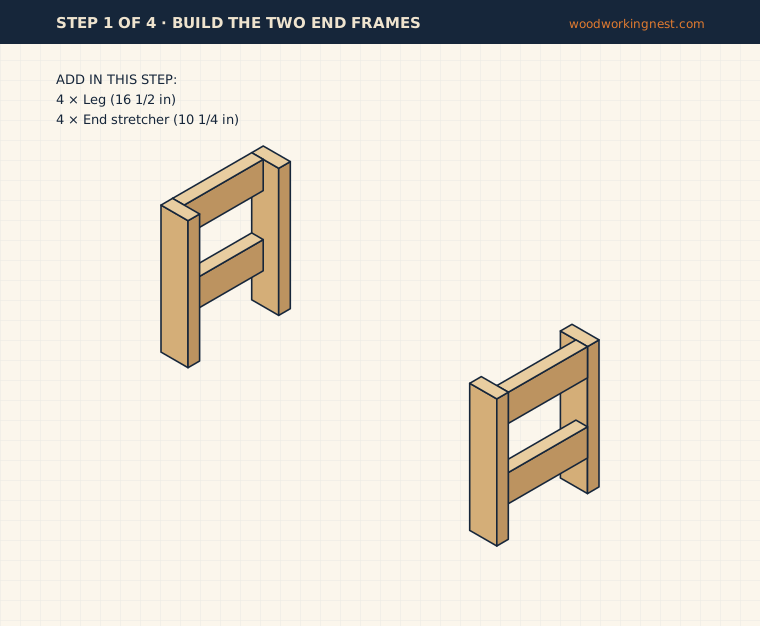
Tip: Clamp a straight scrap across the leg bottoms while you screw, so both legs stay flush.
Step 2: Attach the aprons
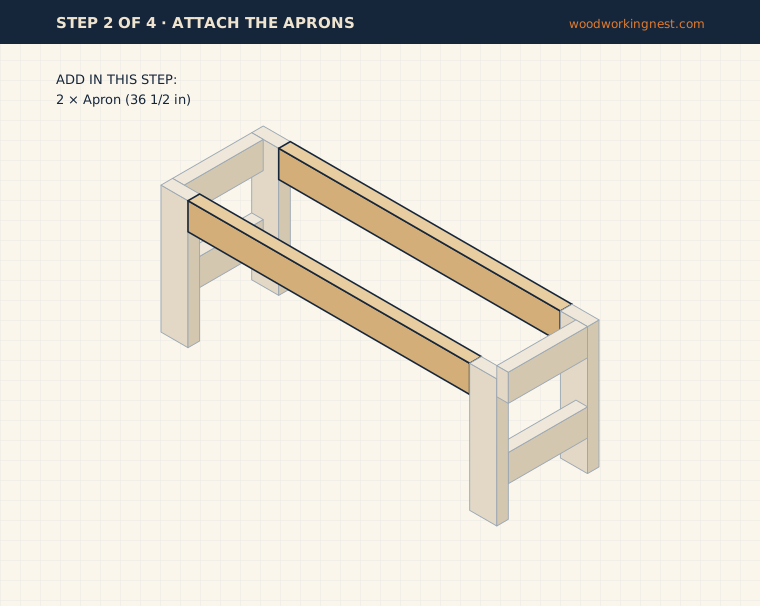
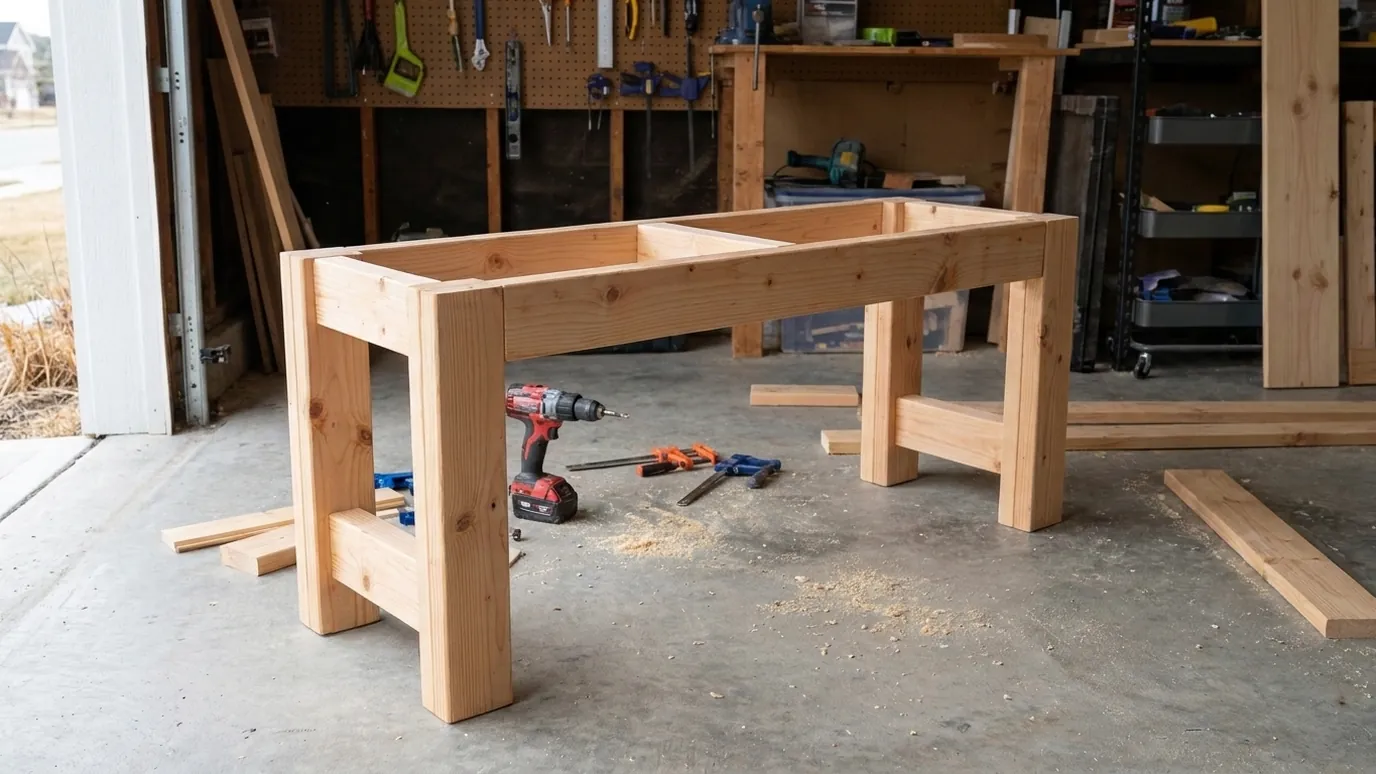
Drill pocket holes in both ends of the two aprons. Stand the end frames up and set an apron between them at the front, its top edge flush with the top of the legs and its outside face flush with the front of the legs. Clamp it, then screw it into the legs. Add the back apron the same way.
With both aprons on, the bench is a rectangle you can check. Measure the top corner to corner both ways and nudge the frame until the numbers match. Then set it on a flat floor and press on each corner. If one leg lifts, trim a hair off the long leg rather than shimming; a bench that rocks now will rock forever.
Step 3: Add the center support
Mark the middle of each apron, 23 3/4 in from either end of the finished bench. Drill pocket holes in both ends of the center support and fit it between the aprons on those marks, top edge flush with the aprons. This one piece makes a big difference: without it, the two middle seat boards span almost 37 in on their own and flex noticeably when someone sits in the center.
Run your hand over the top of the frame after it is in. The aprons, stretchers and center support should all sit at the same height so the seat boards lie flat. Sand or plane any proud edge now, while it is easy to reach.
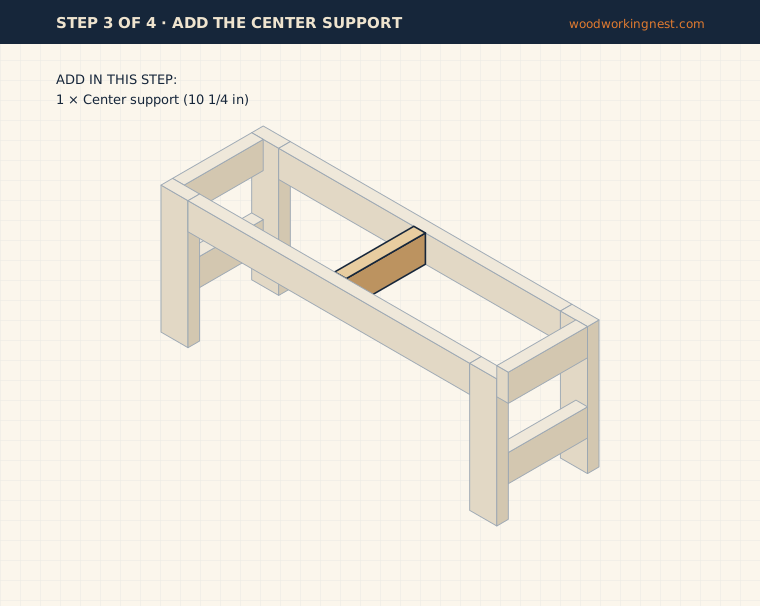
Tip: Use two 2 1/2 in pocket screws at each end of the support.
Step 4: Attach the seat boards
Pick your four best-looking 2x4s for the seat and ease their top edges with sandpaper so they are comfortable to sit on. Lay the first board along the front with a 3/4 in overhang past the apron and 2 in at each end. Fix it with two 2 1/2 in exterior screws into each end stretcher and the center support, driven from the top and set just below the surface, or from below through pocket holes if you prefer no visible screws.
Add the other three boards the same way, using two 1/4 in spacers between boards. Scraps of 1/4 in plywood work well, or a stack of carpenter pencils. Those gaps let rain drain and give the wood room to move. Check that the back board finishes with the same 3/4 in overhang as the front.
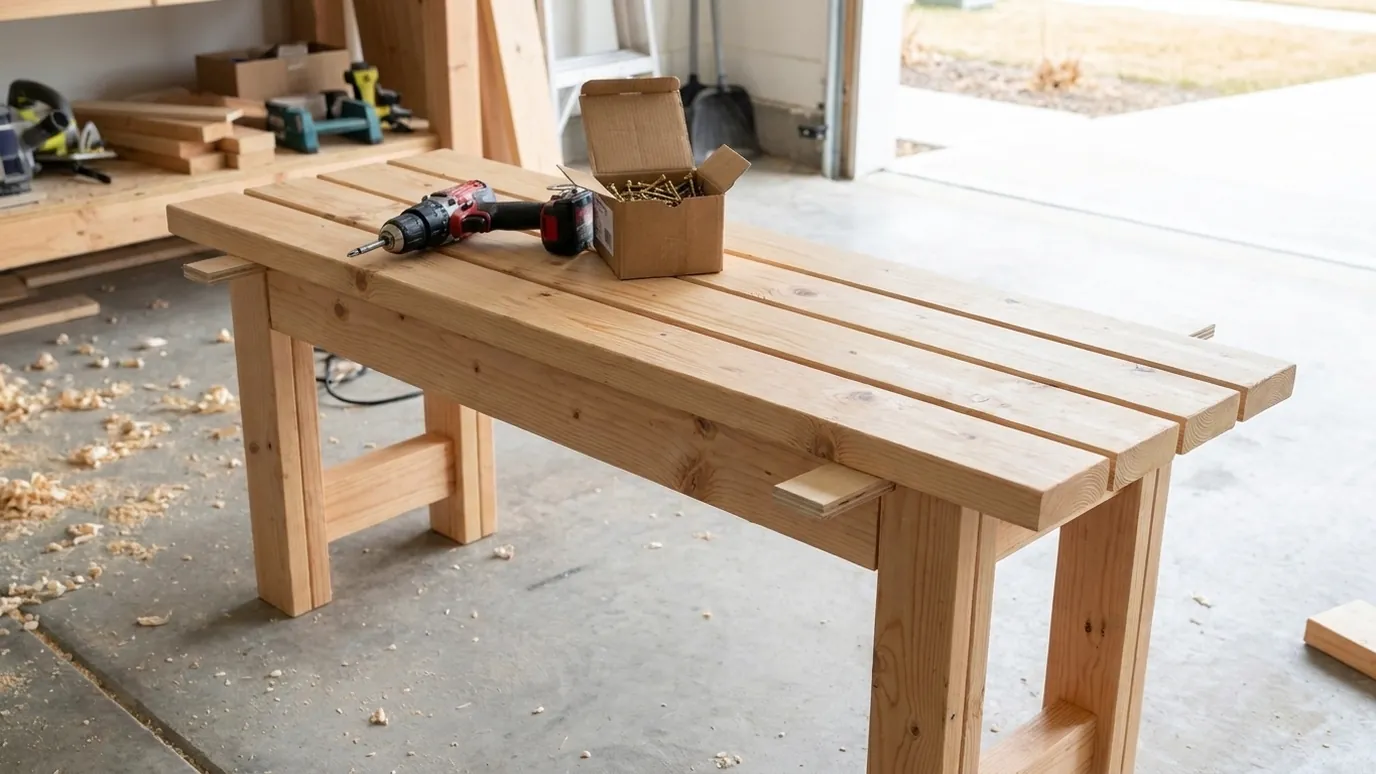
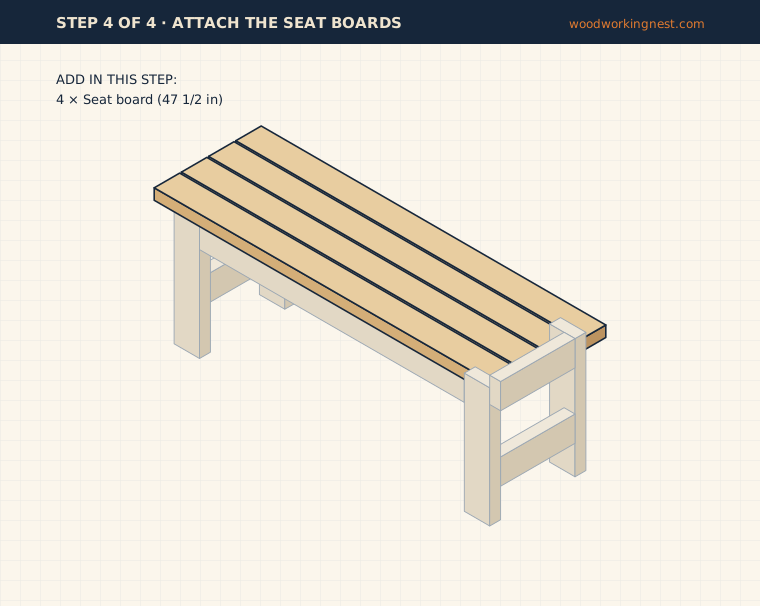
Tip: Pre-drill the screw holes near the board ends so they do not split.
Finishing
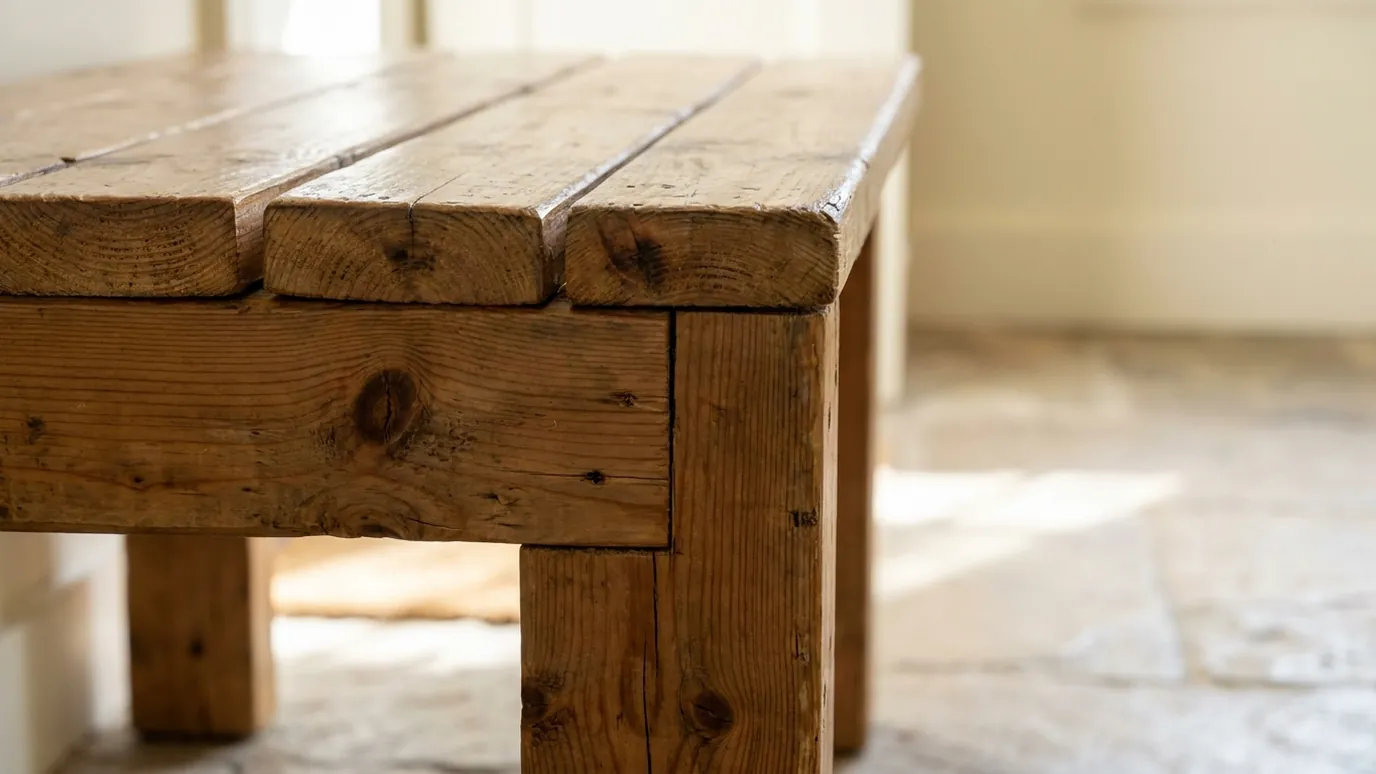
Sand everything to 120 grit, paying extra attention to the seat edges and corners. Indoors, a wipe-on polyurethane or a coat of paint is enough. Outdoors, use an exterior penetrating oil or stain and soak the end grain of the legs, because that is where water gets in first. If you used pressure-treated lumber, wait until it is dry before finishing; most finishes will not soak into wet wood. Plan to refresh an outdoor finish every year or two.
Common mistakes to avoid
The most common mistake with a 2x4 bench is skipping the center support, which leaves the seat springy in the middle. The next is using different lengths for matching parts; measure once, set a stop block, and cut both aprons and all the short pieces from it. Outdoors, people often forget the end grain: feet sitting on wet ground soak up water, so finish the leg bottoms well or add small plastic furniture glides to keep them off the wet patio.
How to change the size
To make the bench longer, add the same length to the seat boards and the two aprons, and for anything over about 60 in add a second center support. A 6 ft seat board still fits a 12 ft 2x4 twice. For a taller counter or bar bench, lengthen only the four legs. For a slatted look with more drainage, increase the gap between seat boards to 3/8 in and lengthen the end stretchers by the extra width. If you want a backrest, see the garden bench plans that will follow in our outdoor woodworking plans.
Finished 2x4 bench photos
Safety
Wear safety glasses for every cut and hearing protection with power saws. Clamp short pieces instead of holding them near the blade, and use a stop block rather than your hand to set matching lengths. Wear gloves and a dust mask when cutting pressure-treated lumber, wash up afterwards, and never burn the offcuts. These plans do not include a load rating; the bench is designed for ordinary seating. Read our woodworking safety guide before you start.
Frequently asked questions
How many 2x4s do I need for a 2x4 bench?
Five 8 ft 2x4s. Two make the four seat boards, and the other three cover the legs, aprons, end stretchers and center support, with a little left over.
Are these 2x4 bench plans good for beginners?
Yes. Every cut is a straight crosscut, the joints are simple screwed butt or pocket hole joints, and the whole build takes an afternoon with a saw, a drill and a couple of clamps.
How tall should a bench be?
Most benches have a seat 17–19 in (43–48 cm) high. This plan is 18 in, about the same as a dining chair.
Can I build this simple bench without a pocket hole jig?
Yes. Screw through the outside of the legs into the stretchers and aprons with 2 1/2 in exterior screws, two per joint. The screw heads will show, but the bench will be just as sturdy.
What wood should I use for an outdoor 2x4 bench?
Cedar or pressure-treated pine, with exterior screws. Leave the 1/4 in gaps between seat boards so water drains, and seal the end grain on the legs.
How much weight can a 2x4 bench hold?
We do not give a load rating, because it depends on the lumber and how it is assembled. With glued joints and the center support, the bench is designed for normal seating.
Can I make these diy bench plans longer?
Yes. Add the same length to the seat boards and the aprons. Above about 60 in, add a second center support so the seat does not flex.
Related plans
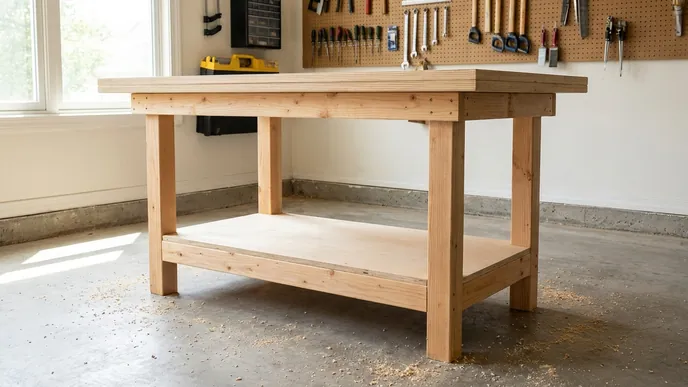
More plans: all furniture plans · every free woodworking plan · board foot calculator
How this plan was made
This is a conceptual design: it was drawn from a full 3D part model and checked so the cut list, the diagrams and the finished size agree, but it has not yet been built and photographed by us. The joinery and sizes follow common, well-tested bench practice.
 Technically reviewed by Daniel Brooks on . Senior woodworking contributor and technical plan reviewer. He checked the measurements, the materials and the assembly steps.
Written by Woodworking Nest Editors. Measurements, the cut list and all diagrams come from one shared 3D part model, so they always agree. Photos marked “Illustrative render” were created with AI image tools to show the finished look; they are not photos of a real build. Status: Technically reviewed. Found a mistake? Tell us and we will fix it (see our corrections policy).