DIY Desk Plans: A Simple Desk You Can Build in a Day
By Woodworking Nest Editors · Updated
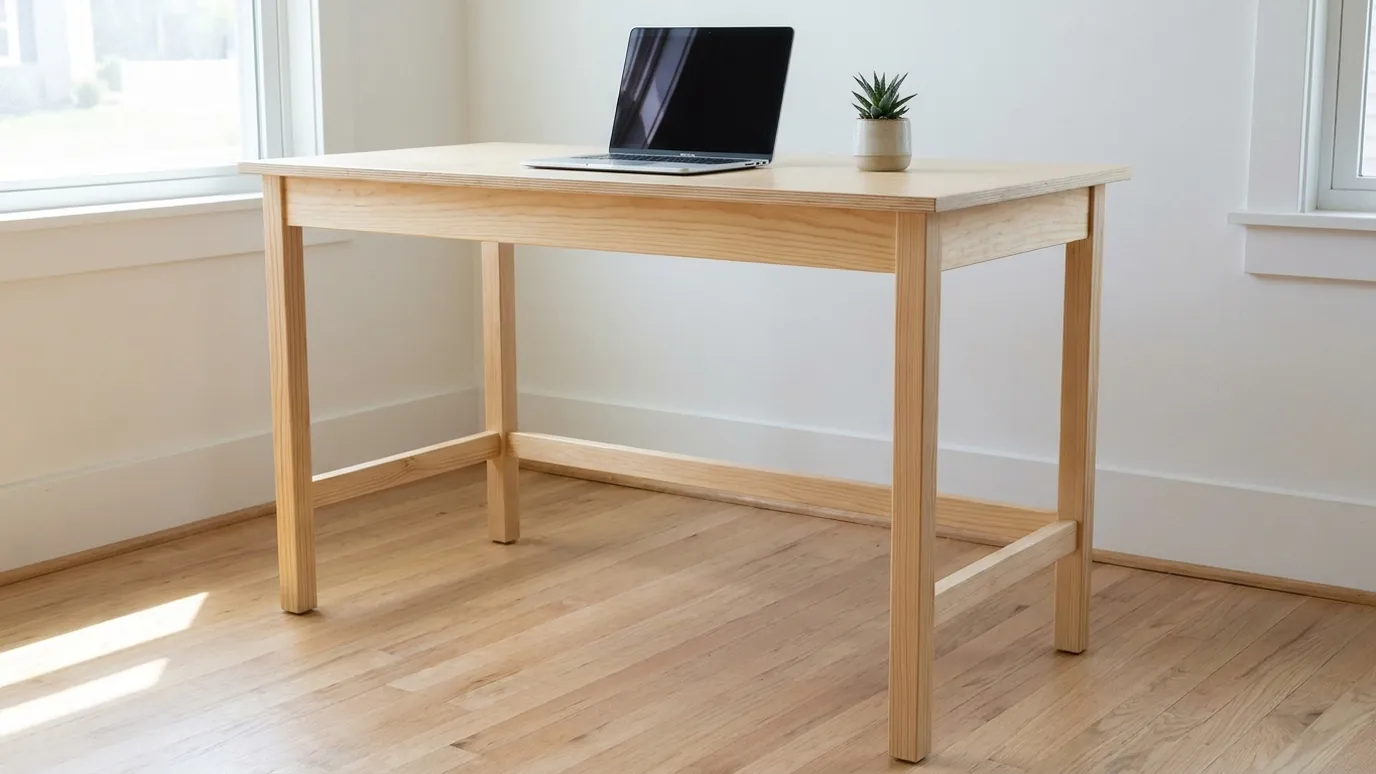
These DIY desk plans build a simple desk 48 in wide, 24 in deep and 30 in tall. You need two 2x2s, two 1x3s and one 2 × 4 ft sheet of 3/4 in plywood. Build two side frames, join them with front and back aprons, then screw on the plywood top from below.
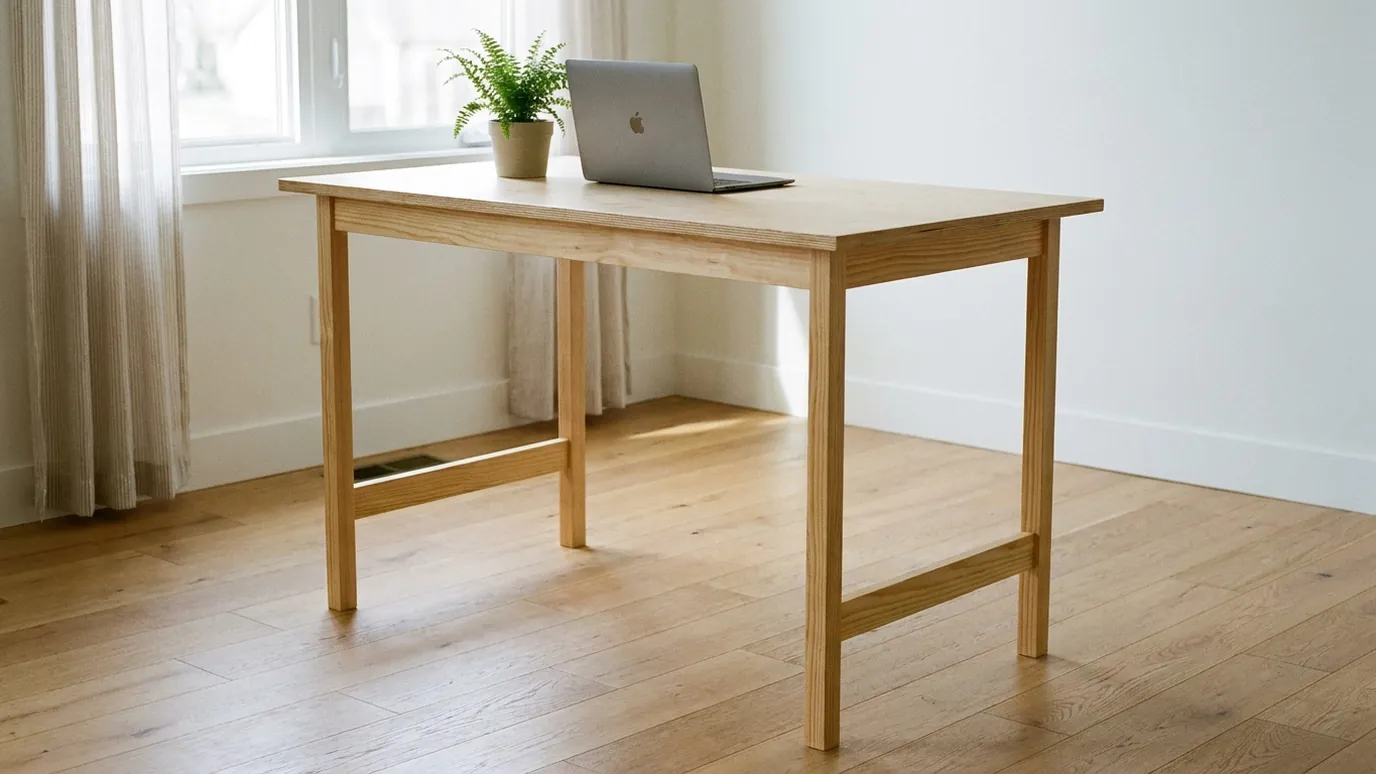
A desk is one of the most useful things you can build, and it does not need to be complicated. This one has four slim 2x2 legs, a narrow 1x3 apron under the top and a plain 3/4 in plywood top. The result is a light, clean-looking desk that fits a laptop, a monitor and a lamp, and it slips into a spare bedroom or a corner of the living room without taking it over.
The top is a 2 × 4 ft plywood project panel, a size most home centers sell ready to go, so there is no big sheet to wrestle home and no long rip cuts. The side stretchers near the floor keep the legs from wobbling while leaving the whole front open for your knees and your chair. If you have built something small before, like our 2x4 bench, you already have the skills for this one.
- Difficulty
- Beginner
- Build time
- About 3–4 hours, plus finishing (estimate)
- Finished size
- 48 × 24 × 30 in
1219 × 610 × 762 mm - Lumber
- 2x2 and 1x3 pine, 3/4 in plywood top
- Cost
- Two 2x2s, two 1x3s and a 2 × 4 ft plywood panel — check local prices
- PDF plans
- Coming soon
Dimensions
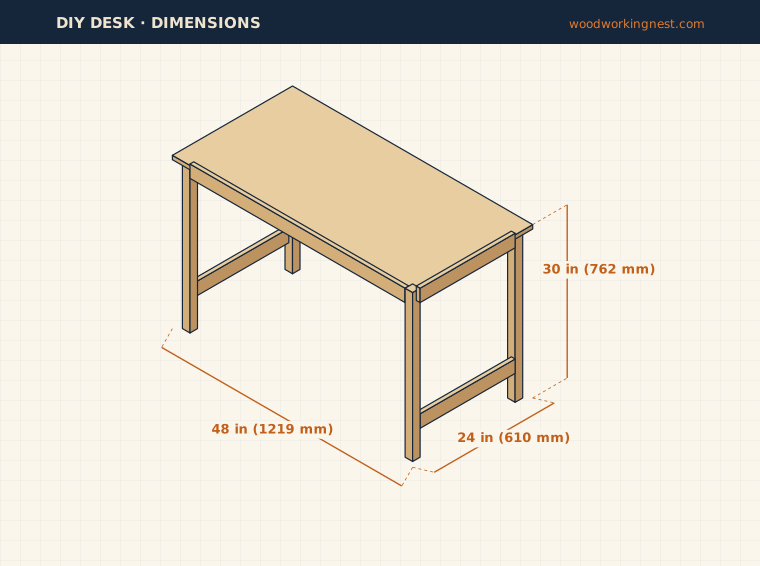
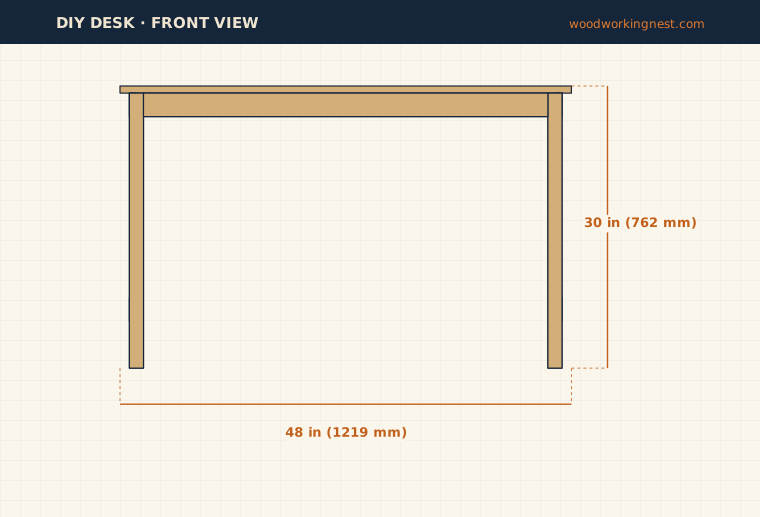
The finished desk is 48 in (1219 mm) wide, 24 in (610 mm) deep and 30 in (762 mm) tall. Thirty inches is a standard desk height and works for most adults with a normal office chair. Under the front apron there is about 26 3/4 in of clearance, which leaves room for your knees. Twenty-four inches of depth gives space for a laptop or keyboard in front of a monitor. The legs sit 1 in in from each edge of the top, so you can push the chair close without bumping a corner.
Materials (shopping list)
Choose 2x2s that are straight and free of large knots, because thin legs show every bend. Sight down each one at the store. A 2 × 4 ft panel of birch or other hardwood plywood gives a much smoother top than construction plywood, and its edges sand to a neat line. In the UK, use 44 × 44 mm planed timber for the legs and 18 × 69 mm for the aprons with an 18 mm plywood top; in Australia, 42 × 42 mm pine legs and 19 × 65 mm aprons are close equivalents.
| Material | Qty | Size | Notes |
|---|---|---|---|
| 2x2 lumber | 2 | 8 ft (2.4 m) | Straight boards for the legs |
| 1x3 board | 2 | 8 ft (2.4 m) | Aprons and side stretchers |
| Plywood project panel | 1 | 3/4 in, 2 × 4 ft (24 × 48 in) | Birch or other hardwood plywood |
| Pocket hole screws | about 40 | 1 1/4 in coarse thread | |
| Wood glue | 1 small bottle | ||
| Iron-on edge banding | 1 roll | 3/4 in, about 12 ft | Optional, for the top edges |
Cut list
Cut the four 29 1/4 in legs first, three from one 8 ft 2x2 and the fourth from the second. From the first 1x3, cut the two 43 in long aprons. From the second, cut the two side aprons and two side stretchers, all 19 in long. Use a stop block for each length, because matching parts need to match exactly for the desk to stand flat. The plywood panel needs no cutting if you buy a 24 × 48 in project panel.
| Part | Qty | Length | Width | Thickness | Material |
|---|---|---|---|---|---|
| Leg | 4 | 29 1/4 (743 mm) | 1 1/2 (38 mm) | 1 1/2 (38 mm) | 2x2 |
| Side apron | 2 | 19 (483 mm) | 2 1/2 (64 mm) | 3/4 (19 mm) | 1x3 |
| Side stretcher | 2 | 19 (483 mm) | 2 1/2 (64 mm) | 3/4 (19 mm) | 1x3 |
| Long apron | 2 | 43 (1092 mm) | 2 1/2 (64 mm) | 3/4 (19 mm) | 1x3 |
| Top | 1 | 48 (1219 mm) | 24 (610 mm) | 3/4 (19 mm) | 3/4 in plywood |
Tools
You need a saw for crosscuts, a drill and driver, a tape measure, a square and clamps. A pocket hole jig is the best tool here: it makes strong joints in thin 1x3 parts and hides every screw. Without one, you can use 2 1/2 in screws through the legs into the apron ends, but pre-drill carefully, because 2x2s split easily near the ends.
Essential: Tape measure, Miter saw, Drill/driver, Pocket hole jig, Clamps, Safety glasses, Speed square
Optional: Random orbit sander, Household iron (for edge banding)
Step-by-step instructions
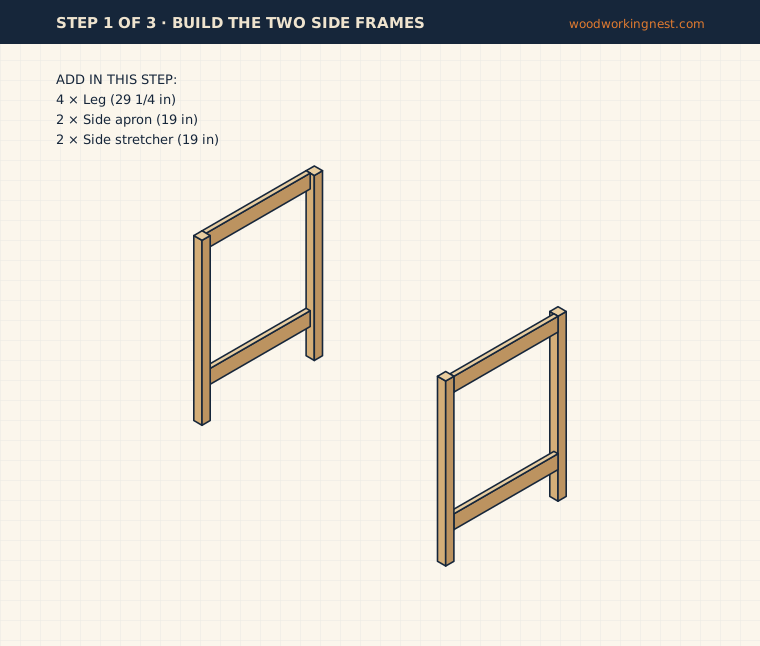
Step 1: Build the two side frames
Drill two pocket holes in each end of the two side aprons and the two side stretchers, set for 3/4 in stock. Lay two legs flat on your work surface, 22 in apart across their outside faces. Fit a side apron between them at the top, its top edge flush with the leg tops and its outside face flush with the outside of the legs. Fit a stretcher between the legs 5 in up from the bottom. Glue the joints and drive 1 1/4 in pocket screws.
Check the frame for square by measuring corner to corner, then build the second side the same way. Face the pocket holes inward on both frames so they stay hidden once the desk is assembled.
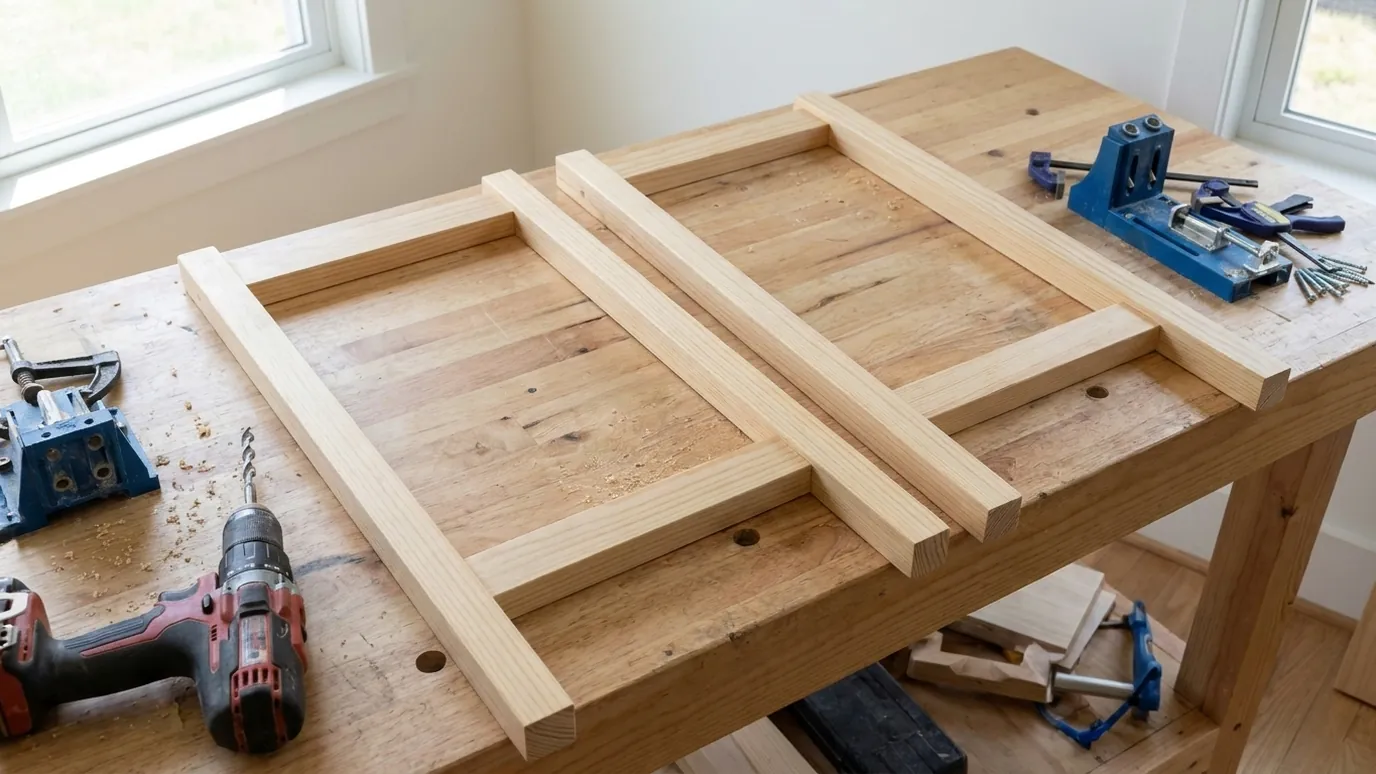
Tip: A 5 in scrap block under each stretcher gives an exact, repeatable height.
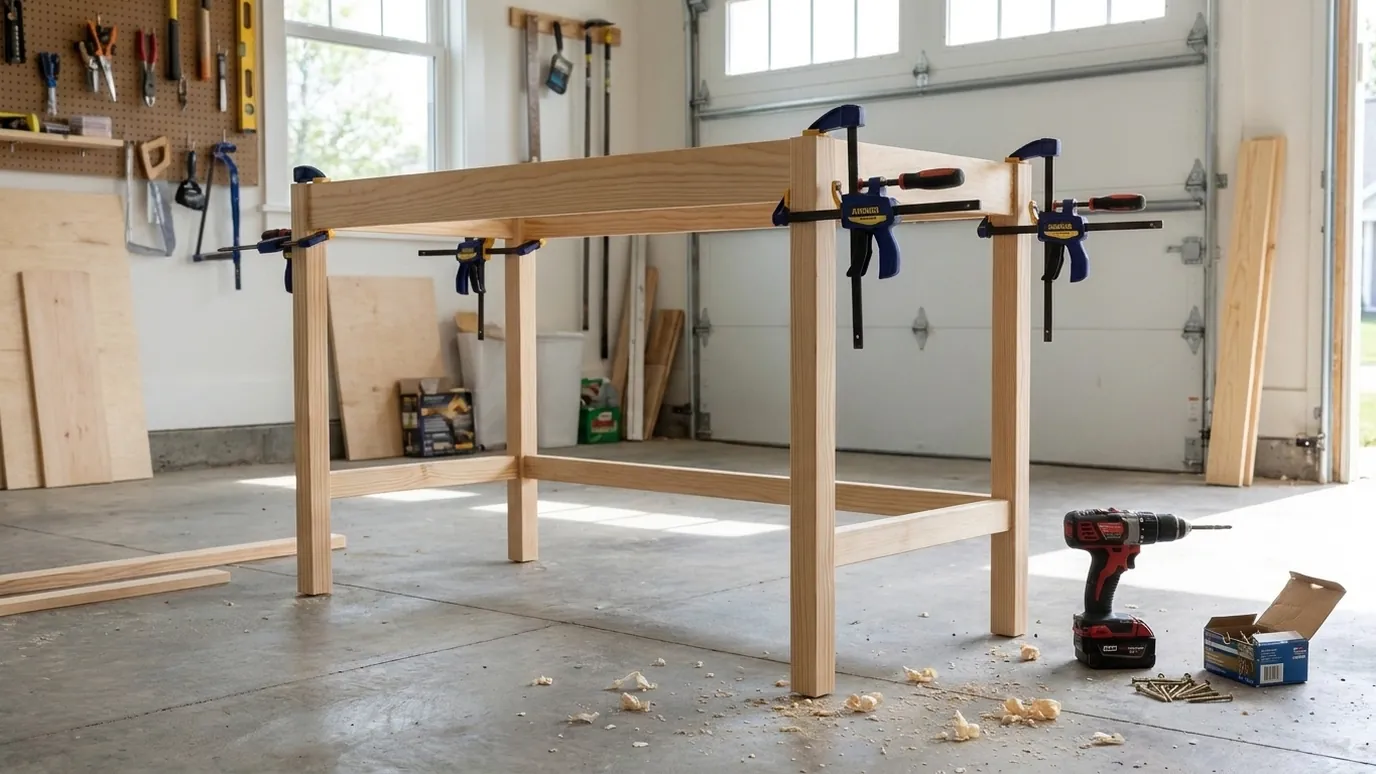
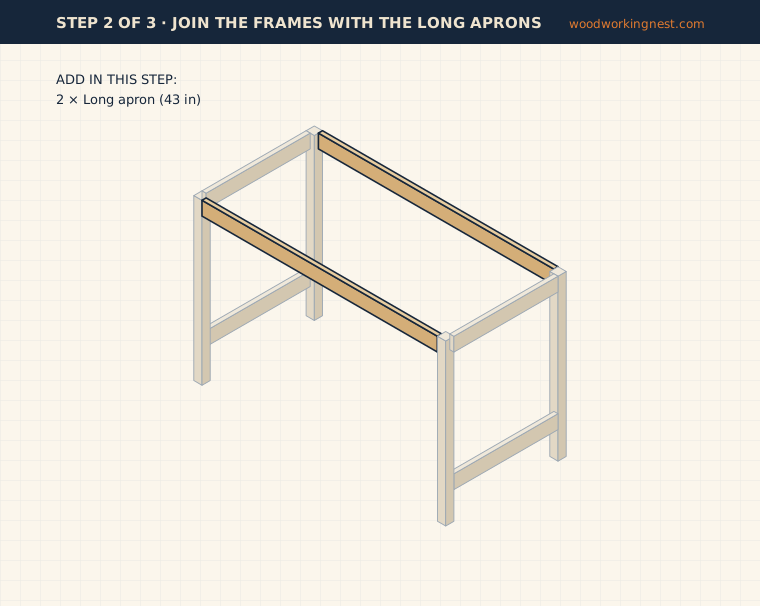
Step 2: Join the frames with the long aprons
Drill two pocket holes in each end of the two long aprons. While you are at it, drill pocket holes along the inside face of all four aprons, pointing up, about every 10 in. You will use these to fix the top later. Stand the side frames up and clamp the front apron between them, flush with the leg tops and the front faces of the legs. Screw it in place with 1 1/4 in pocket screws and glue, then add the back apron the same way.
Set the frame on a flat floor and check that all four legs touch. Measure the top of the frame corner to corner and nudge it square before the glue sets.
Step 3: Attach the plywood top
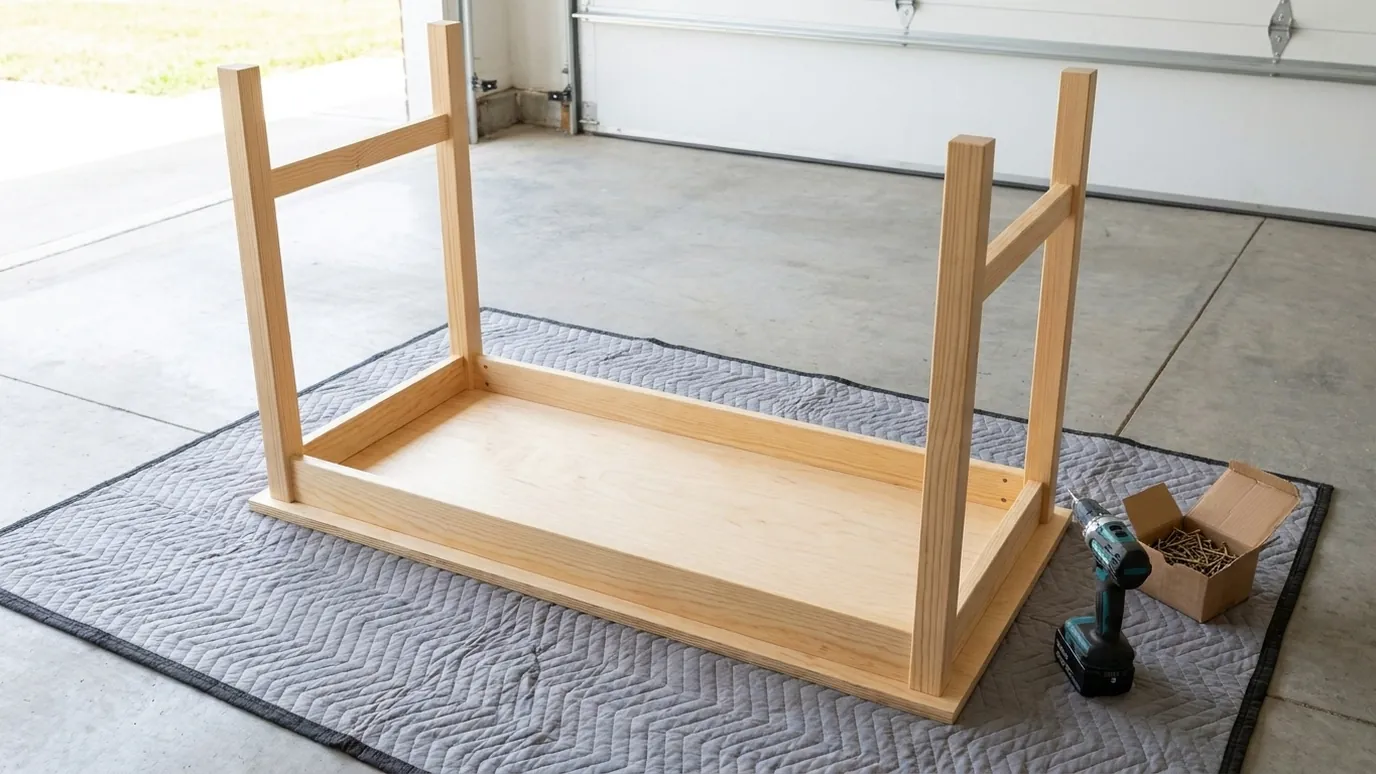
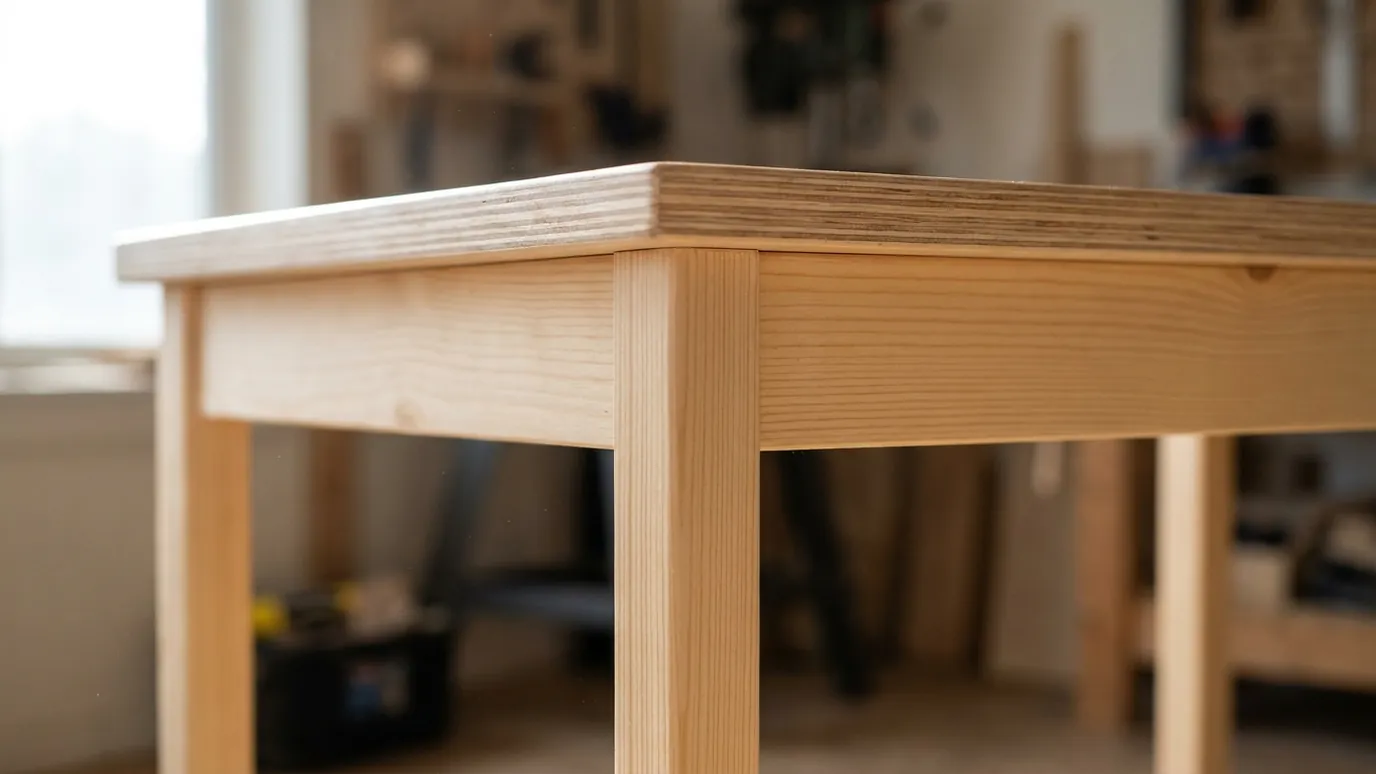
Sand the top before you attach it; it is much easier on a flat bench than on a finished desk. Lay the plywood good side down on a blanket, then turn the frame upside down onto it. Center the frame so the top overhangs the legs by 1 in on every side, and check with a tape at each corner.
Drive 1 1/4 in pocket screws up through the holes in the aprons into the plywood. They will not come through the top: 3/4 in apron plus 3/4 in top is longer than the screw needs. If your plywood edges look rough, iron on a matching edge banding now and trim it flush with a sharp knife.
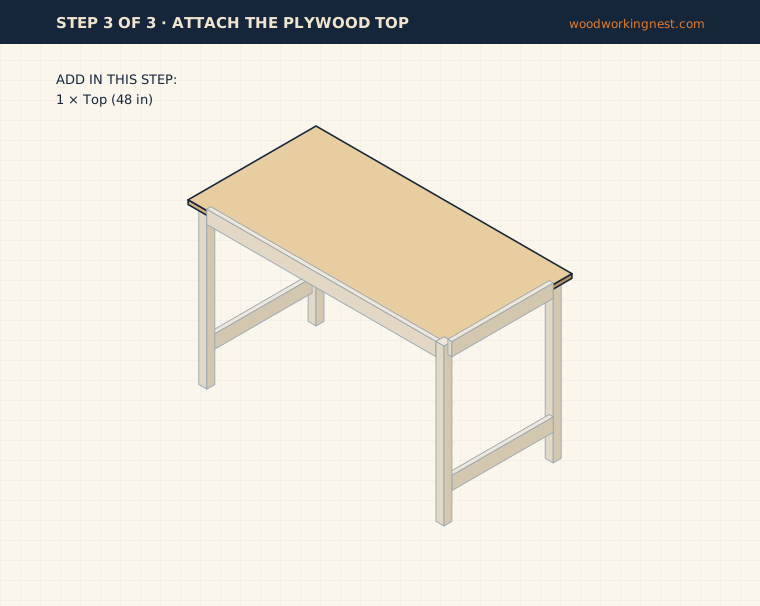
Tip: Use a scrap of 1/4 in plywood to check that the overhang is the same all round.
Finishing
Sand the frame to 150 grit and the top to 180 grit, and soften every sharp edge, especially the front edge of the top where your wrists rest. A desk top takes daily wear from mugs, elbows and a mouse, so use a durable finish: three coats of water-based polyurethane, sanding lightly between coats, give a clear, hard surface that does not yellow. If you paint the base, prime first and leave the top clear for a two-tone look. Let the finish cure for a few days before putting a monitor on it.
Common mistakes to avoid
The most common problem is a desk that wobbles side to side. That usually comes from skipping the glue or the side stretchers, or from legs of slightly different lengths. Cut all four legs against one stop block. The second mistake is drilling the pocket holes for the top on the wrong face; drill them on the inside face of each apron before assembly, when the parts are easy to reach. Finally, check your screw length before driving into the top: a screw that is too long will poke through the work surface.
How to change the size
To make a wider computer desk, lengthen the top and the two long aprons by the same amount. Above about 60 in, add a center apron from front to back under the top so it does not sag. For a standing desk, lengthen the legs to about 40–42 in and add a second pair of long stretchers low at the back for stiffness. A narrow shelf between the side stretchers makes room for a printer or storage boxes. For a small cheap DIY desk, a 2 × 3 ft top with 34 1/2 in long aprons works for a laptop. More ideas are in our beginner woodworking projects.
Finished DIY desk photos
Safety
Wear safety glasses for every cut and while drilling. Clamp short parts before cutting or drilling instead of holding them by hand. Use a dust mask when sanding plywood. These plans do not include a load rating; the desk is designed for normal home office use. Read our woodworking safety guide before you start.
Frequently asked questions
Are these DIY desk plans good for beginners?
Yes. There are only five different parts, every cut is a straight crosscut, and the top needs no cutting if you buy a 2 × 4 ft plywood panel. The only special tool is a pocket hole jig.
How do you build a desk with basic tools?
Build two side frames from legs and short rails, join them with a front and back apron, and screw a plywood top on from below. A saw, a drill, clamps and a pocket hole jig are enough.
What is a good height for a desk?
Most desks are 28–30 in (71–76 cm) tall. This plan is 30 in. If you are much shorter or taller than average, change the leg length by the same amount you want to change the height.
What wood should I use for a desk top?
Hardwood plywood, such as birch, is flat, stable and smooth. Solid wood looks great but moves with the seasons and needs more care to keep flat. Construction plywood works if you plan to cover it.
Can I make this a computer desk with a monitor?
Yes. The 24 in depth leaves room for a keyboard in front of a monitor. For two large monitors, widen the desk to 60 in and add a center apron under the top.
How much does it cost to build a simple desk?
The materials are two 2x2s, two 1x3s, a plywood panel, glue and screws. That usually costs less than a store-bought solid wood desk of the same size, but prices vary by region and wood grade.
Related plans
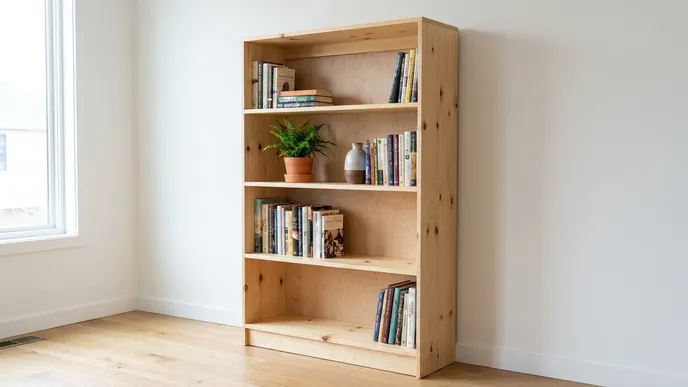
How to Build a Bookshelf: Simple DIY Bookshelf Plans
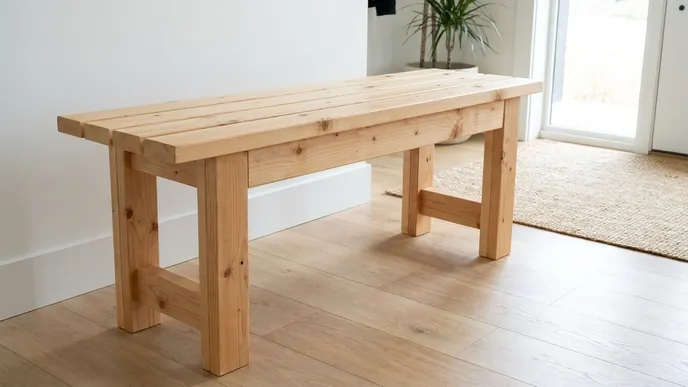
2x4 Bench Plans: Simple DIY Bench for Indoors or Out
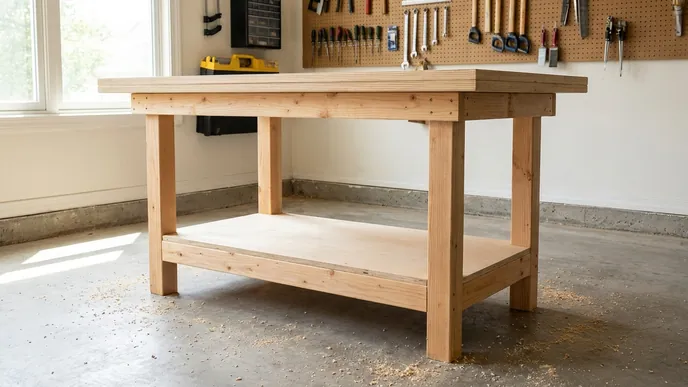
2x4 Workbench Plans: A Sturdy DIY Workbench With a Shelf
More plans: all furniture plans · every free woodworking plan · board foot calculator
How this plan was made
This plan was designed from a full 3D part model and checked so the cut list, the diagrams and the finished size agree. It has not yet been built and photographed by us. The joinery and sizes follow common, well-tested desk practice.
Written by Woodworking Nest Editors. Measurements, the cut list and all diagrams come from one shared 3D part model, so they always agree. Photos marked “Illustrative render” were created with AI image tools to show the finished look; they are not photos of a real build. Status: Conceptual design. Found a mistake? Tell us and we will fix it (see our corrections policy).