Garden Bench Plans: A Simple 2x4 Bench with a Back
By Woodworking Nest Editors · Reviewed by Daniel Brooks · Updated
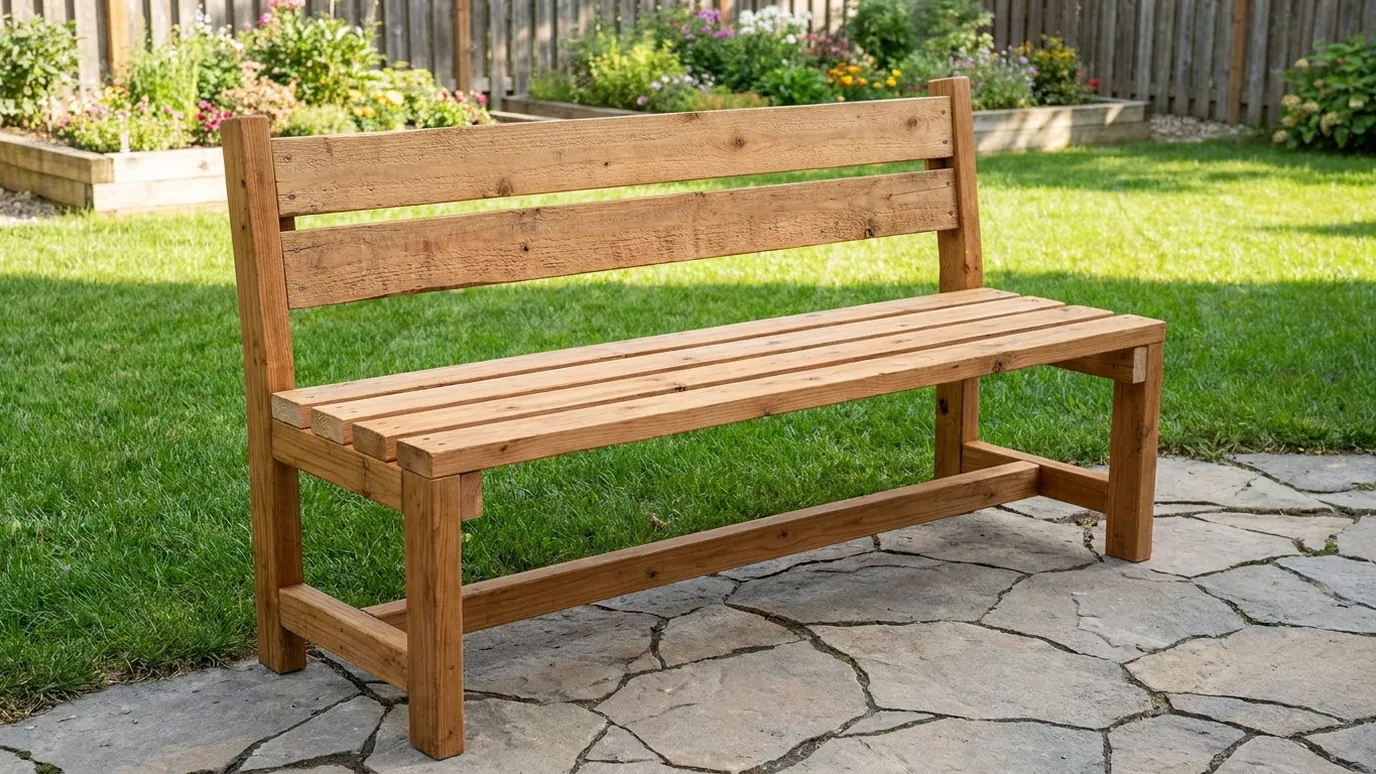
These garden bench plans build a bench 60 in long with a 17 1/2 in seat height and a 34 in tall back. It uses eight 8 ft 2x4s for the frame and seat and two 2x6s for the backrest, joined with exterior screws. Two adults sit on it comfortably, and it takes about an afternoon to build.
A bench with a back is the piece that turns a corner of the yard into a place you actually sit. Of all the outdoor bench plans you can follow, these garden bench plans keep it simple: every part is a straight cut from standard 2x4 and 2x6 lumber, there are no angles to work out, and the whole bench goes together with a drill and exterior screws.
The design starts with two end frames, like the ends of a table. A front apron, a back apron and a center support tie them together into a stiff seat frame, and a low stretcher keeps the legs from racking when someone sits down at one end. Five 2x4 slats make the seat, and two wide 2x6 boards across the back legs make the backrest. If you are new to woodworking, this DIY garden bench is a good first outdoor project. If you want a bench without a back for a porch or a dining table, our 2x4 bench is a faster build. To finish the space, pair it with a cedar planter box at each end.
- Difficulty
- Beginner
- Build time
- About 4–5 hours, plus finishing (estimate)
- Finished size
- 60 × 21 1/2 × 34 in
1524 × 546 × 864 mm - Lumber
- Cedar or pressure-treated 2x4 and 2x6 lumber
- Cost
- Eight 8 ft 2x4s and two 6 ft 2x6s — check local prices
- PDF plans
- Coming soon
Dimensions
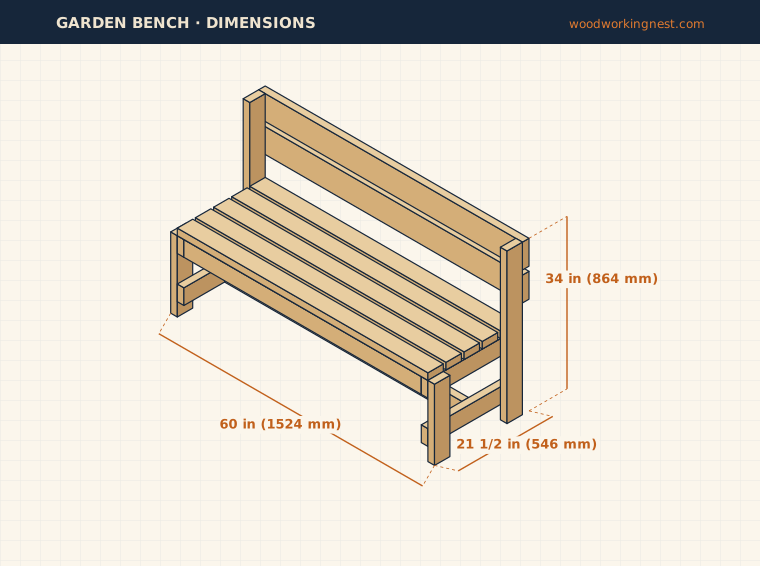
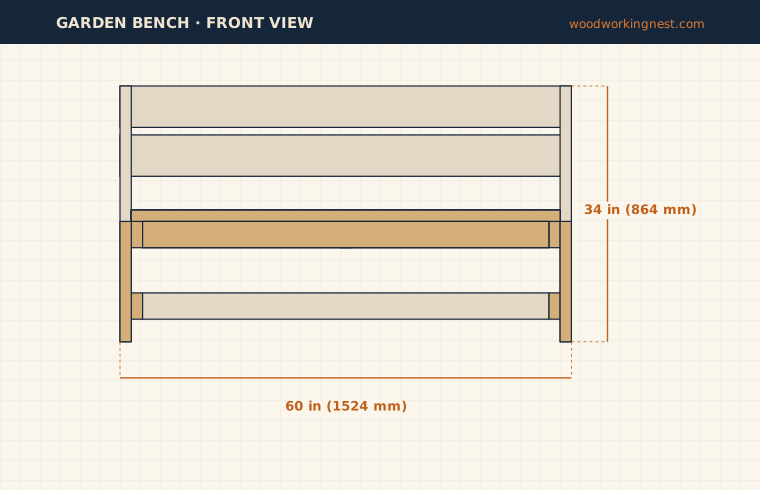
The finished bench is 60 in (1524 mm) long, 21 1/2 in (546 mm) deep and 34 in (864 mm) tall. The seat sits 17 1/2 in (445 mm) off the ground, the usual height for outdoor seating, and the seat is 20 in (508 mm) deep. The back boards start 4 1/2 in above the seat and reach 34 in, which supports the lower and middle back. Five feet of seat fits two adults comfortably, or three for a short sit. Lumber sizes vary a little, so measure your boards and cut the aprons and stretcher to fit between the seat supports.
Materials (shopping list)
For an outdoor bench, use lumber that lasts outside. Cedar is light, smells good and resists rot; pressure-treated pine is cheaper and stronger but heavier, and needs to dry for a few weeks before it takes paint or stain. Choose straight boards with few knots for the seat slats, because those are what people see and touch. Use exterior-rated coated or stainless steel screws, never plain interior screws, which rust and stain the wood. In the UK, look for 47 × 75 mm and 47 × 150 mm treated or larch timber; in Australia, 70 × 35 or 90 × 45 mm treated pine (H3) or cypress.
| Material | Qty | Size | Notes |
|---|---|---|---|
| 2x4 lumber | 8 | 8 ft (2.4 m) | Cedar or pressure-treated; straightest boards for the seat slats |
| 2x6 lumber | 2 | 6 ft (1.8 m) or longer | Back boards |
| Exterior wood screws | about 100 | 2 1/2 in, coated or stainless steel | |
| Sandpaper | a few sheets | 120 grit | |
| Exterior oil, stain or paint | 1 quart (1 L) | Optional |
Cut list
Cut the five 57 in seat slats first, one from each of five 8 ft 2x4s. The 39 in offcuts from those boards give you the two 34 in back legs, the two 16 in front legs (both from one offcut), the 17 in center support and two of the 20 in end parts. Three more 2x4s each give a 54 in part (front apron, back apron and stretcher) plus another 20 in end part, so you have the four seat supports and lower rails with one spare. The two 60 in back boards come from two 2x6s. Label each part as you cut it, and sand the ends of the slats and back boards before assembly, since they are hard to reach later.
| Part | Qty | Length | Width | Thickness | Material |
|---|---|---|---|---|---|
| Seat slat | 5 | 57 (1448 mm) | 3 1/2 (89 mm) | 1 1/2 (38 mm) | 2x4 |
| Front apron | 1 | 54 (1372 mm) | 3 1/2 (89 mm) | 1 1/2 (38 mm) | 2x4 |
| Back apron | 1 | 54 (1372 mm) | 3 1/2 (89 mm) | 1 1/2 (38 mm) | 2x4 |
| Stretcher | 1 | 54 (1372 mm) | 3 1/2 (89 mm) | 1 1/2 (38 mm) | 2x4 |
| Back leg | 2 | 34 (864 mm) | 3 1/2 (89 mm) | 1 1/2 (38 mm) | 2x4 |
| Seat support | 2 | 20 (508 mm) | 3 1/2 (89 mm) | 1 1/2 (38 mm) | 2x4 |
| Lower rail | 2 | 20 (508 mm) | 3 1/2 (89 mm) | 1 1/2 (38 mm) | 2x4 |
| Center support | 1 | 17 (432 mm) | 3 1/2 (89 mm) | 1 1/2 (38 mm) | 2x4 |
| Front leg | 2 | 16 (406 mm) | 3 1/2 (89 mm) | 1 1/2 (38 mm) | 2x4 |
| Back board | 2 | 60 (1524 mm) | 5 1/2 (140 mm) | 1 1/2 (38 mm) | 2x6 |
Tools
You need a miter saw or circular saw, a drill/driver, a tape measure, a square and two clamps. A countersink bit helps the screw heads sit flush on the seat and back, where they would otherwise catch on clothing. A sander takes the sharp edges off the slats so the seat is comfortable.
Essential: Tape measure, Miter saw, Drill/driver, Clamps, Safety glasses, Speed square
Optional: Random orbit sander, Countersink bit
Step-by-step instructions
Step 1: Build the two end frames
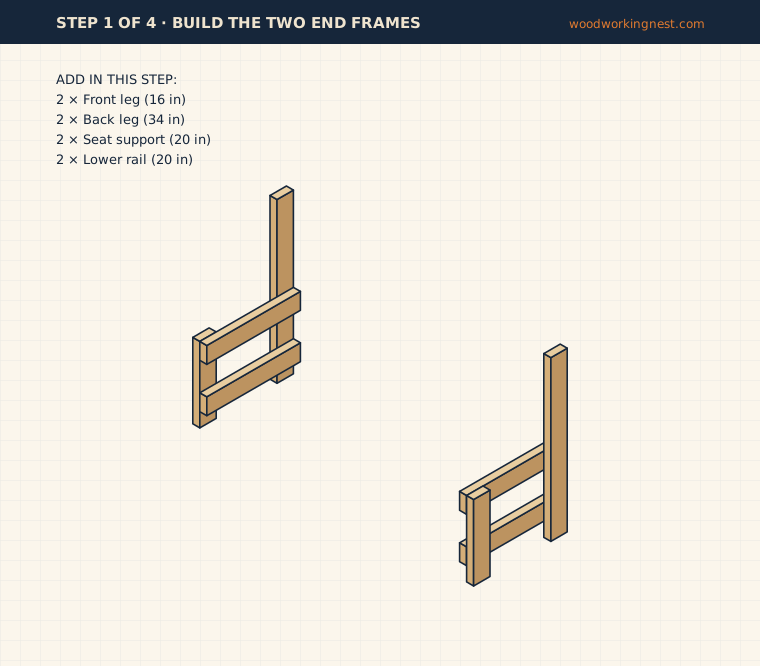
Each end of the bench is a frame made of a 16 in front leg, a 34 in back leg, a 20 in seat support and a 20 in lower rail. Lay the two legs on a flat surface, 20 in apart outside to outside. Place the seat support across them with its top flush with the top of the front leg, then place the lower rail 3 in up from the bottom. Clamp, check that the legs are square to the support, and fasten each joint with two 2 1/2 in exterior screws.
Build the second end frame as a mirror image, so the supports and rails end up on the inside of the bench on both ends. Set the two frames side by side and check that they match before you go on.
Tip: Use a scrap of 2x4 as a spacer under the lower rail, so it sits at the same height on both frames.
Step 2: Join the end frames
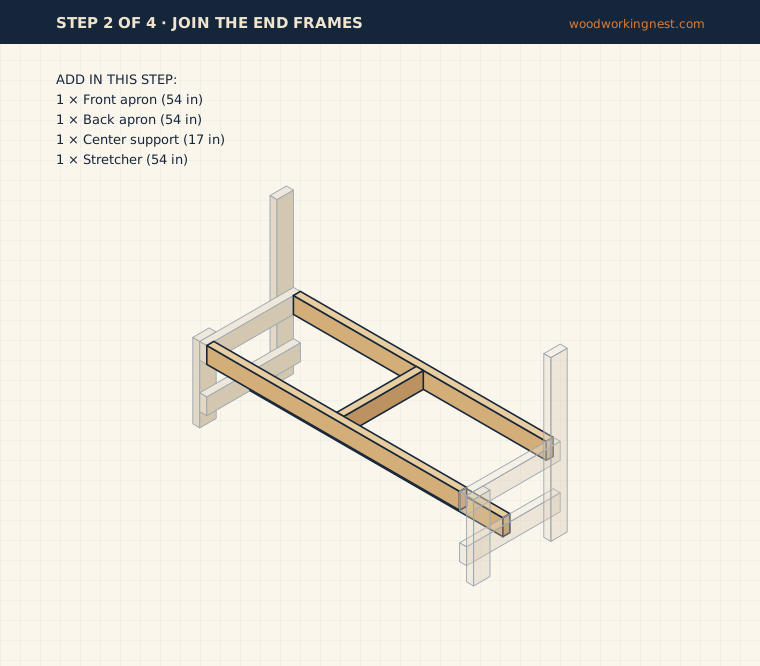
Stand the end frames up with the supports facing each other. Fit the 54 in front apron between the seat supports, flush with their front ends and tops, and screw through each support into the apron. Fit the back apron the same way at the back. Then fit the 54 in stretcher between the lower rails at their center, 9 1/4 in from the front, and screw it in place.
Measure the frame corner to corner across the top; when both diagonals match, it is square. Finally, set the 17 in center support between the two aprons at the middle of the bench and screw through the aprons into its ends. It stops the seat slats from sagging in the middle.
Tip: Pre-drill near board ends so the screws do not split the 2x4s.
Step 3: Attach the seat slats
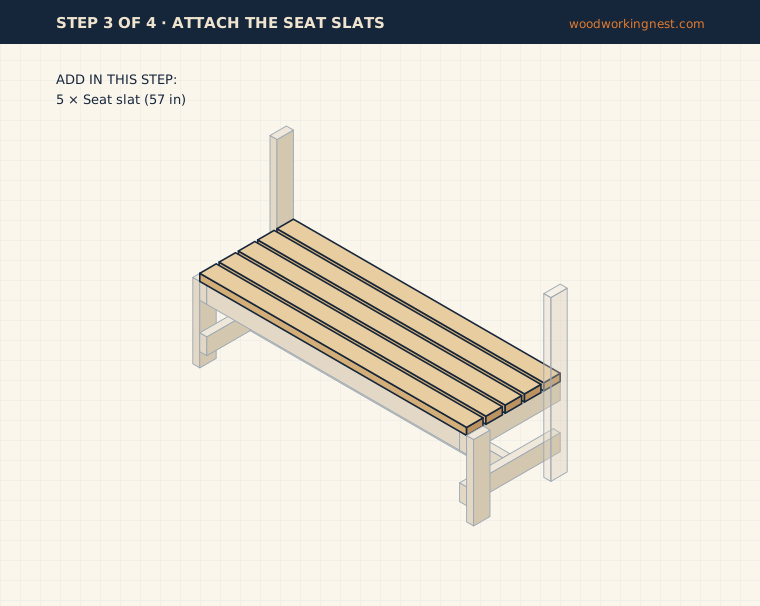
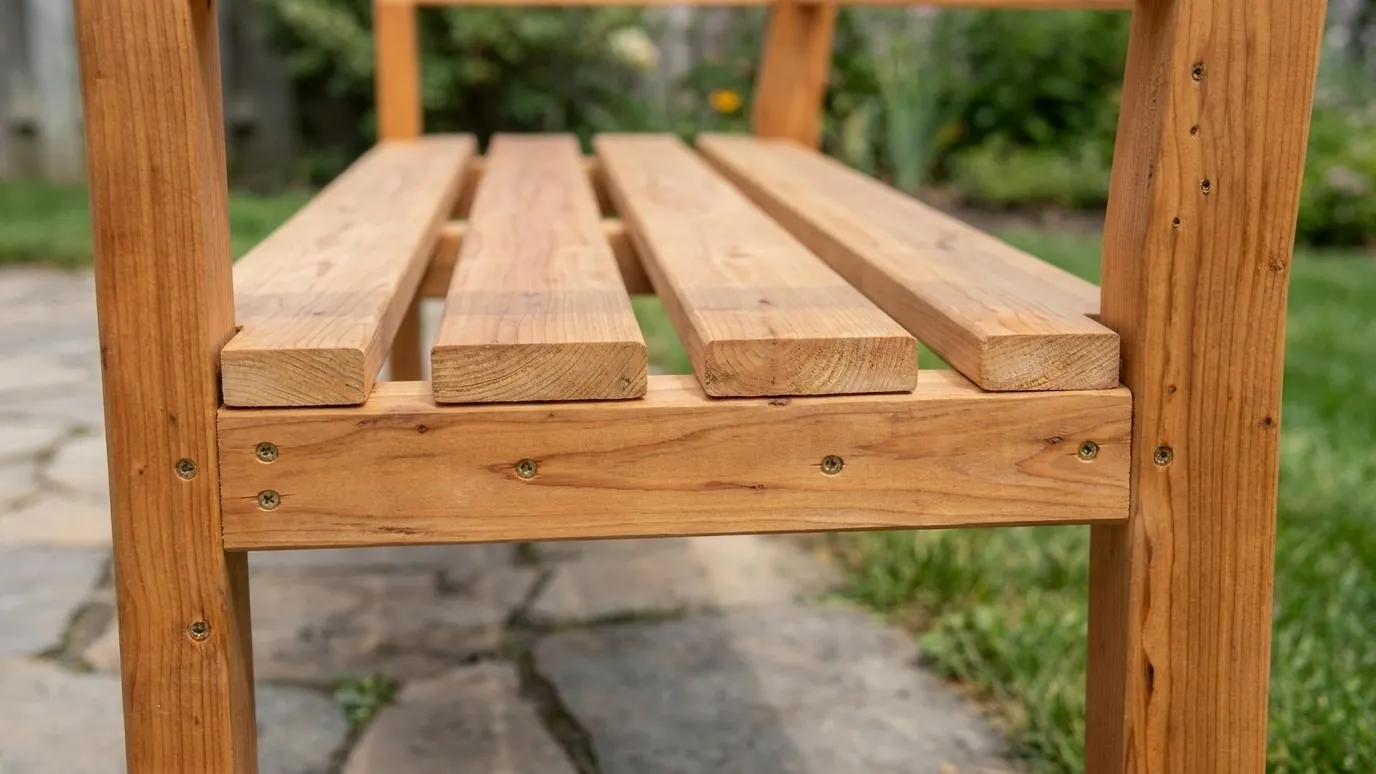
Lay the five 57 in seat slats flat on the seat frame, running the length of the bench and fitting between the legs at each end. Start with the front slat flush with the front apron, and work toward the back with a 5/8 in gap between slats. A couple of scraps of 1/2 in plywood plus a washer make good spacers. The last slat ends flush with the back of the seat frame.
Pre-drill and countersink two screws into each seat support, two into the center support and, for the front and back slats, a few into the aprons. Keep the screw lines straight across the seat; it looks neater and makes the bench feel finished.
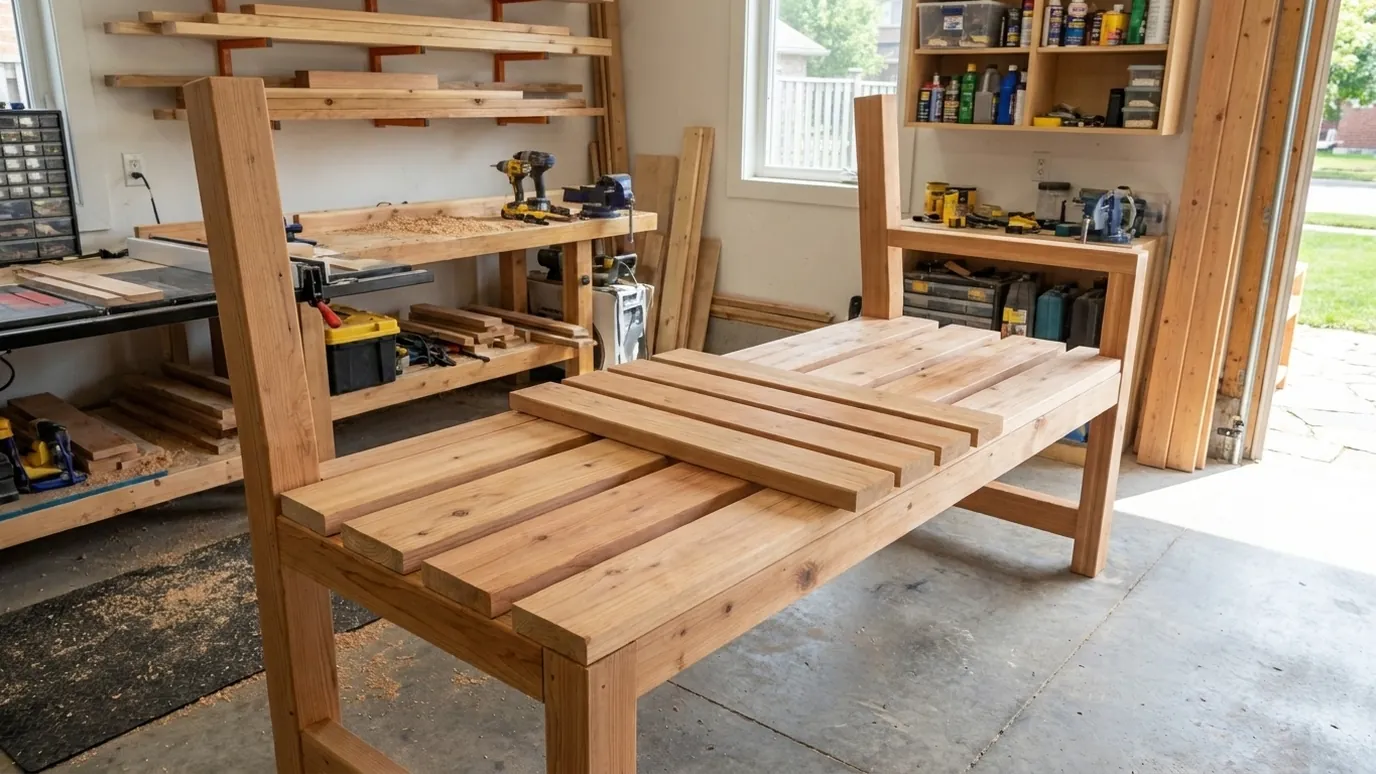
Tip: The gaps let rain drain off the seat, so do not push the slats tight together.
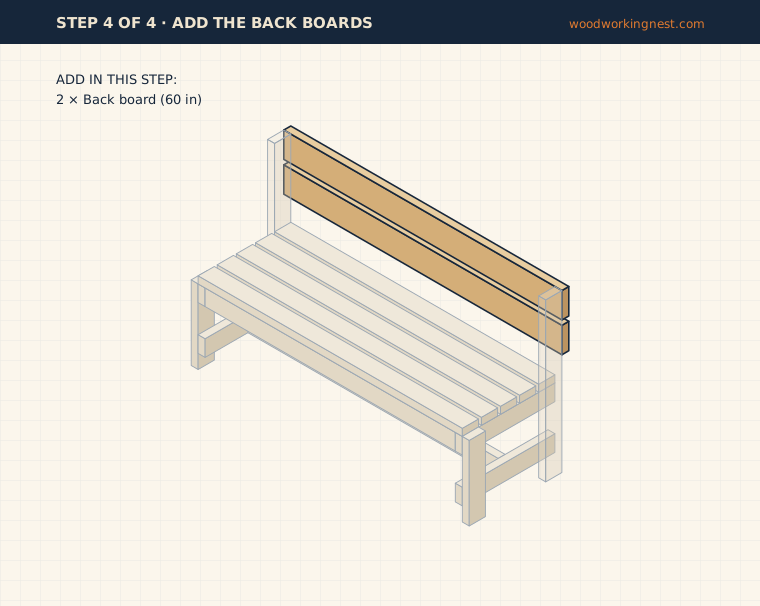
Step 4: Add the back boards
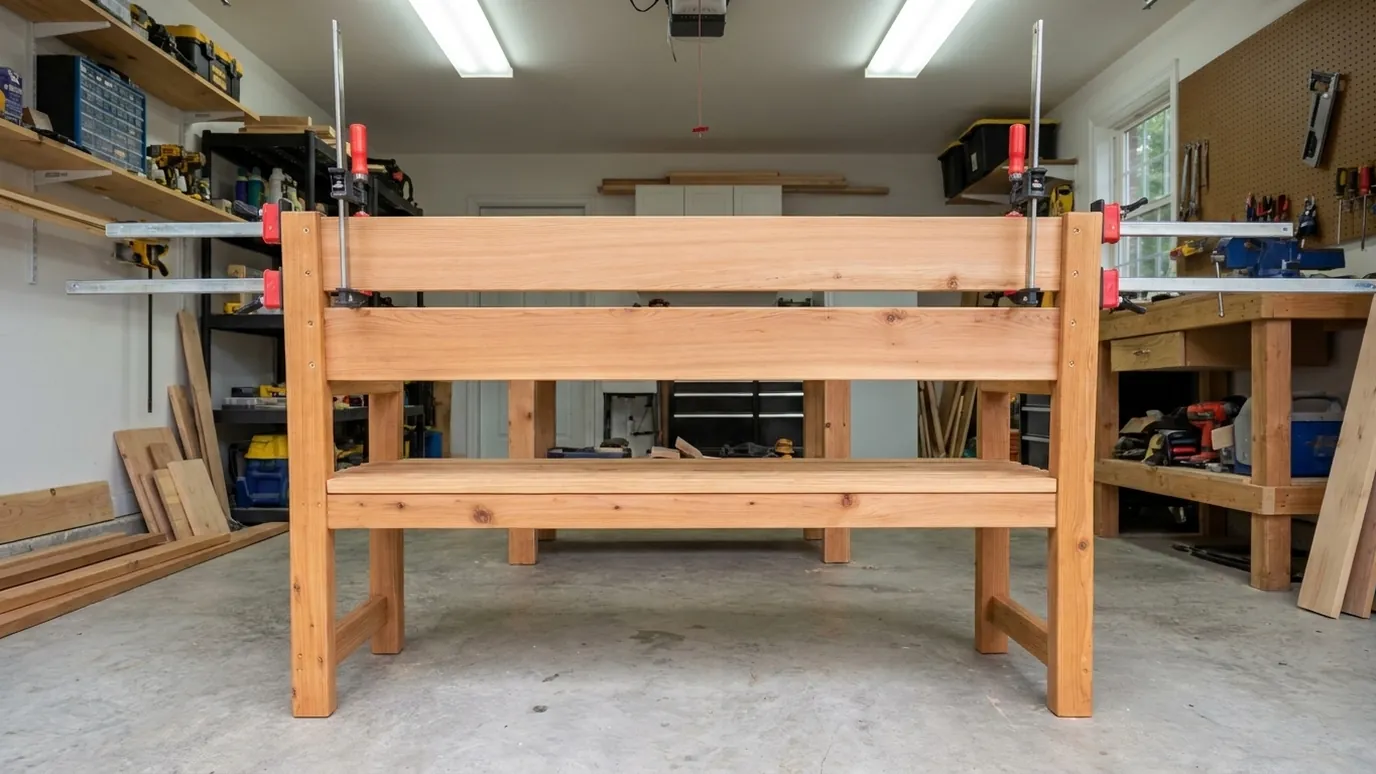
Clamp the first 60 in 2x6 back board across the back face of the two back legs, with its top 6 1/2 in below the top of the legs and its ends flush with the outside of the bench. Pre-drill and drive three countersunk screws into each leg. Add the second back board above it, leaving a 1 in gap, so its top is flush with the tops of the back legs.
Sit on the bench and lean back to check it feels solid. If the ground is uneven, trim the bottom of the long legs slightly or set the bench on pavers, rather than letting it rock on two feet.
Safety: Do not stand on the seat or lean heavily on the backrest until every screw is in.
Finishing
Sand every edge and corner a little round, especially the front edge of the seat and the top edge of the back, which are the parts you touch most. For cedar, an exterior penetrating oil keeps the warm color; reapply it once a year. Pressure-treated lumber should dry for a few weeks first, then take an exterior stain or paint. Seal the bottom ends of the legs well, because that is where water soaks in. Leaving cedar bare is fine too: it weathers to silver grey and still lasts for years.
Common mistakes to avoid
The most common mistake is building the two end frames the same way instead of as mirror images, which leaves one seat support on the outside. The second is skipping the center support, so the 57 in slats sag over time. The third is using interior screws, which rust within a season and leave black streaks on the wood. Finally, check the frame is square before the slats go on; once they are screwed down, a twisted bench stays twisted.
How to change the size
For a longer bench that seats three, make it 72 in long: the slats become 69 in, the aprons and stretcher 66 in, and you should add a second center support. For a 2x4 outdoor bench with a different look, swap the 2x4 seat slats for 2x6 boards (three or four of them) for a wider, flatter look. Add 2x4 armrests on top of the front legs, running back to the back legs, for a more comfortable seat. For a bench with no back, see our 2x4 bench, or build a pair of matching raised garden beds to sit beside.
Safety
Wear safety glasses when cutting and driving screws, and a dust mask when cutting or sanding pressure-treated lumber. Keep fingers clear of the blade when cutting short parts, and clamp them rather than holding them. Check the bench regularly for loose screws or rotting leg ends, especially if it stays outside all year. Read our woodworking safety guide before you start.
Frequently asked questions
Are these garden bench plans good for beginners?
Yes. Learning how to build a garden bench like this one is mostly measuring and cutting square. Every cut is a straight cut across a 2x4 or 2x6, there are no angles, and the whole bench is screwed together. If you can measure, cut square and drive a screw, you can build it.
What is a good seat height for an outdoor bench?
Most outdoor benches have a seat 17–18 in (43–46 cm) off the ground. This bench is 17 1/2 in, which suits most adults and matches standard patio tables.
What wood is best for a DIY garden bench?
Cedar is light and naturally rot-resistant, so it is the most popular choice. Pressure-treated pine is cheaper and stronger. Teak and other hardwoods last longest but cost much more and are harder to cut.
How many people can sit on a 5 ft garden bench?
Two adults sit comfortably on a 60 in bench, and three can squeeze on for a short time. For three people, build the 72 in version in the variations.
How do I keep an outdoor bench from rotting?
Use cedar or pressure-treated lumber, seal the bottom ends of the legs, and keep the legs off wet soil by setting the bench on pavers or gravel. Re-oil or re-stain it every year or two.
Can I add arms to this garden bench with a back?
Yes. Screw a 2x4 flat on top of each front leg, running back to the back leg, and add a short block under the front of each arm for support. Make the arms about 24 in long.
Related plans
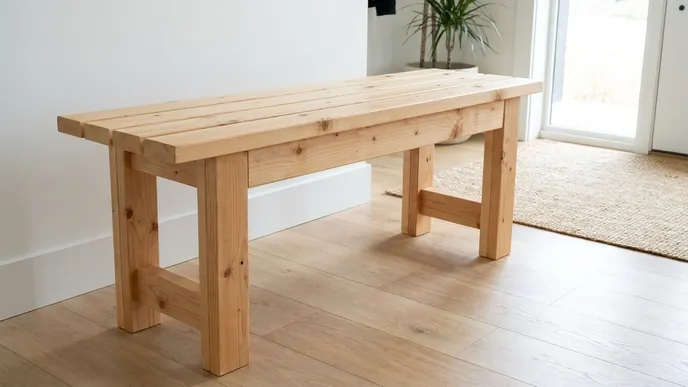
2x4 Bench Plans: Simple DIY Bench for Indoors or Out
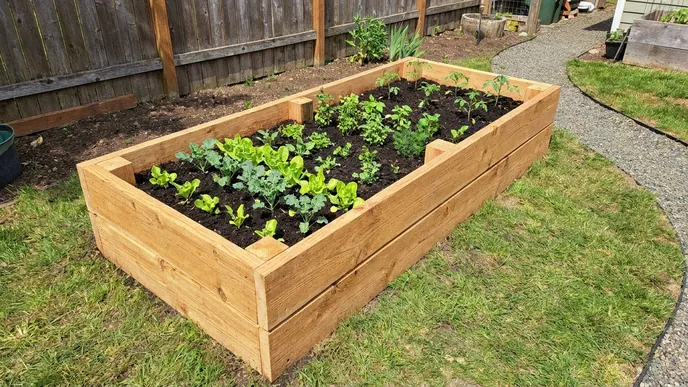
Raised Garden Bed Plans: A 4 × 8 ft Cedar Bed
More plans: all outdoor woodworking plans · every free woodworking plan · board foot calculator
How this plan was made
This plan was designed from a full 3D part model and checked so the cut list, the diagrams and the finished size agree. It has not yet been built and photographed by us. The joinery and sizes follow common, well-tested outdoor bench practice.
 Technically reviewed by Daniel Brooks on . Senior woodworking contributor and technical plan reviewer. He checked the measurements, the materials and the assembly steps.
Written by Woodworking Nest Editors. Measurements, the cut list and all diagrams come from one shared 3D part model, so they always agree. Photos marked “Illustrative render” were created with AI image tools to show the finished look; they are not photos of a real build. Status: Technically reviewed. Found a mistake? Tell us and we will fix it (see our corrections policy).