Miter Saw Station Plans: A 6 ft DIY Miter Saw Stand
By Woodworking Nest Editors · Reviewed by Daniel Brooks · Updated
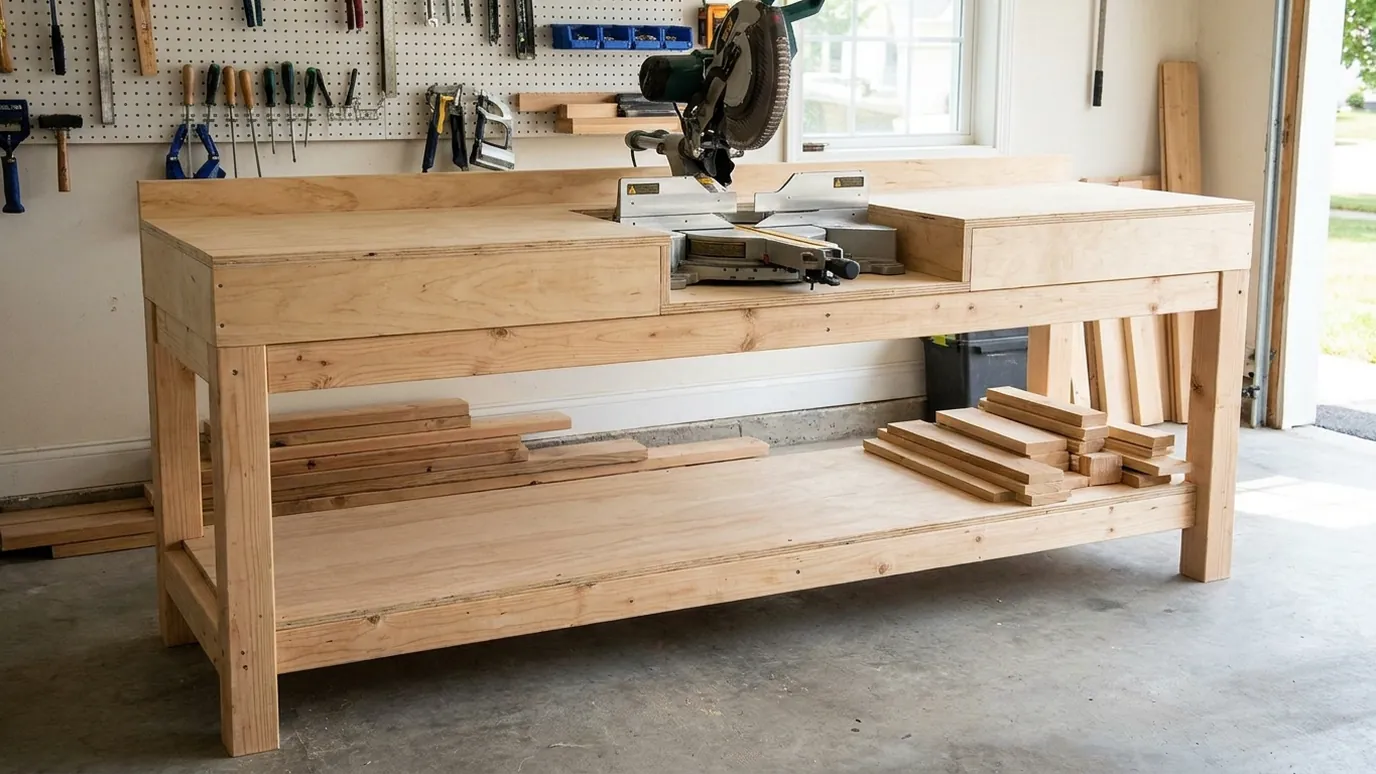
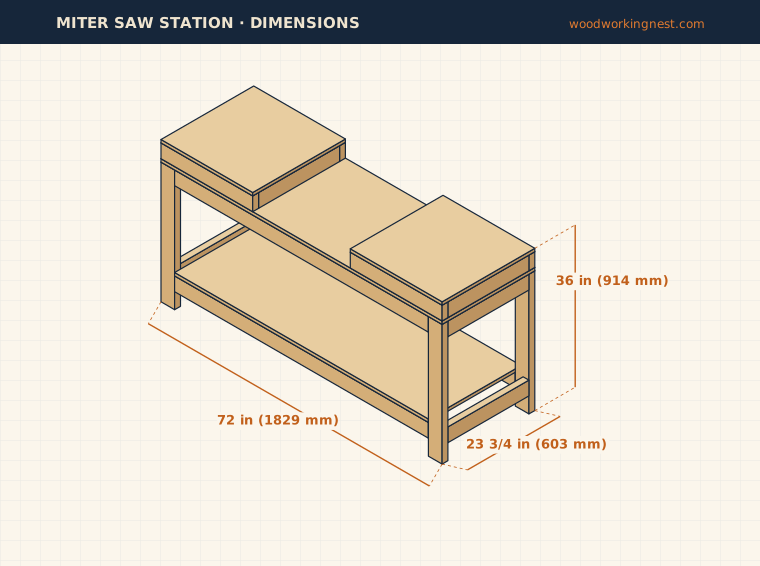
These miter saw station plans build a stand 72 in long, 23 3/4 in deep and 36 in tall at the wings. The saw sits in a 25 in wide recessed bay between two raised wings, so long boards rest level with the saw table. You need nine 2x4s and one sheet of 3/4 in plywood.
A miter saw on the floor or balanced on a pair of sawhorses is hard to use well. Long boards sag, the cut end drops and binds the blade, and you spend half your time hunting for something to hold up the other end. A miter saw station fixes all of that: the saw sits lower than the work surfaces on either side, so the top of its table lines up with the wings and a 6 ft board stays flat through the whole cut.
The base uses the same frame as our 2x4 workbench: two end frames joined by long aprons, with a plywood shelf below for the saw's dust bag, clamps and offcuts. On top, a full-length plywood platform carries the saw, and two simple boxes made of 2x4s on edge raise the wings by 4 1/4 in. Most 10 in and 12 in miter saws have a table that sits a little lower than that, so you bring the saw up to height with a few thin shims, which also lets the station fit the next saw you buy.
- Difficulty
- Beginner
- Build time
- About 5–6 hours (estimate)
- Finished size
- 72 × 23 3/4 × 36 in
1829 × 603 × 914 mm - Lumber
- 2x4 lumber and 3/4 in plywood
- Cost
- Nine 8 ft 2x4s and one sheet of 3/4 in plywood — check local prices
- PDF plans
- Coming soon
Dimensions
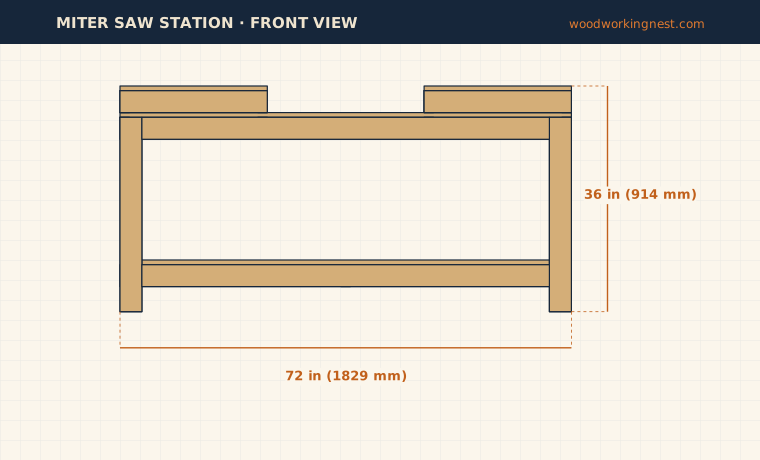
The station is 72 in (1829 mm) long and 23 3/4 in (603 mm) deep. The wings are 36 in (914 mm) high, a comfortable height for cutting, and each wing is 23 1/2 in wide. The saw bay between them is 25 in wide and 4 1/4 in below the wing tops. Measure your saw before you build: its base must fit in 25 in, and the distance from the bottom of its base to the top of its table should be 4 1/4 in or a little less. Check also that a sliding saw has room behind it; with its rails pushed back, some sliders need a few inches clear of the wall.
Materials (shopping list)
Buy straight, dry 2x4s and one sheet of 3/4 in plywood. The platform and wing tops need to be flat, so sanded pine or birch plywood is worth the small extra cost over construction sheathing. You will also want a few sheets of thin material for shims under the saw, such as 1/8 in hardboard or 1/4 in plywood scraps. In the UK, 38 × 89 mm CLS and 18 mm plywood work; in Australia, 90 × 35 mm pine and 17 or 19 mm plywood.
| Material | Qty | Size | Notes |
|---|---|---|---|
| 2x4 lumber | 9 | 8 ft (2.4 m) | Straight, dry boards |
| Plywood | 1 sheet | 3/4 in, 4 × 8 ft | Sanded pine or birch for flat tops |
| Pocket hole screws | about 60 | 2 1/2 in coarse thread | |
| Wood screws | about 60 | 1 1/4 in and 2 1/2 in | For the plywood and wing boxes |
| Wood glue | 1 bottle | ||
| Shims | a few | 1/8 in hardboard or 1/4 in plywood scraps | To bring the saw table level with the wings |
| Bolts or screws for the saw | 4 | To fit your saw's mounting holes | With washers |
Cut list
Rip the plywood sheet into two strips just under 24 in wide. From the first strip, cut the 72 in platform and one 23 1/2 in wing top; from the second, the other wing top and the 65 in shelf. For the 2x4s, pair each 65 in apron with one 20 3/4 in piece on the same board, cut the four legs from the next two boards, and use the rest for the remaining short pieces. There are eleven parts at 20 3/4 in, so set a stop block once and cut them all together.
| Part | Qty | Length | Width | Thickness | Material |
|---|---|---|---|---|---|
| Leg | 4 | 31 (787 mm) | 3 1/2 (89 mm) | 1 1/2 (38 mm) | 2x4 |
| End stretcher | 4 | 20 3/4 (527 mm) | 3 1/2 (89 mm) | 1 1/2 (38 mm) | 2x4 |
| Long apron | 4 | 65 (1651 mm) | 3 1/2 (89 mm) | 1 1/2 (38 mm) | 2x4 |
| Center support | 3 | 20 3/4 (527 mm) | 3 1/2 (89 mm) | 1 1/2 (38 mm) | 2x4 |
| Wing rail | 4 | 23 1/2 (597 mm) | 3 1/2 (89 mm) | 1 1/2 (38 mm) | 2x4 |
| Wing end | 4 | 20 3/4 (527 mm) | 3 1/2 (89 mm) | 1 1/2 (38 mm) | 2x4 |
| Platform | 1 | 72 (1829 mm) | 23 3/4 (603 mm) | 3/4 (19 mm) | 3/4 in plywood |
| Shelf | 1 | 65 (1651 mm) | 23 3/4 (603 mm) | 3/4 (19 mm) | 3/4 in plywood |
| Wing top | 2 | 23 3/4 (603 mm) | 23 1/2 (597 mm) | 3/4 (19 mm) | 3/4 in plywood |
Tools
You need a circular saw or table saw for the plywood rips, a way to make square crosscuts (the miter saw itself works well if you set it on the floor for now), a drill, a tape measure, a square and clamps. A pocket hole jig makes the base faster and cleaner. A level or a long straightedge is essential for the last step, when you shim the saw up to the wings.
Essential: Tape measure, Drill/driver, Clamps, Safety glasses, Speed square, Level, Circular saw or table saw
Optional: Pocket hole jig
Step-by-step instructions
Step 1: Build the two end frames
Drill two pocket holes in each end of the four end stretchers. Lay two legs on edge on a flat floor, 23 3/4 in apart across the outside, and fit one stretcher flush with the top of the legs and another 4 in up from the bottom. Glue and screw them with 2 1/2 in pocket screws, keeping the stretchers flush with the outside face of the legs so the long aprons can butt against them later.
Check both diagonals before the glue grabs, and push the frame square if they differ. Build the second end frame the same way. Because these frames set the height of the whole station, make sure every leg is cut to exactly 31 in.
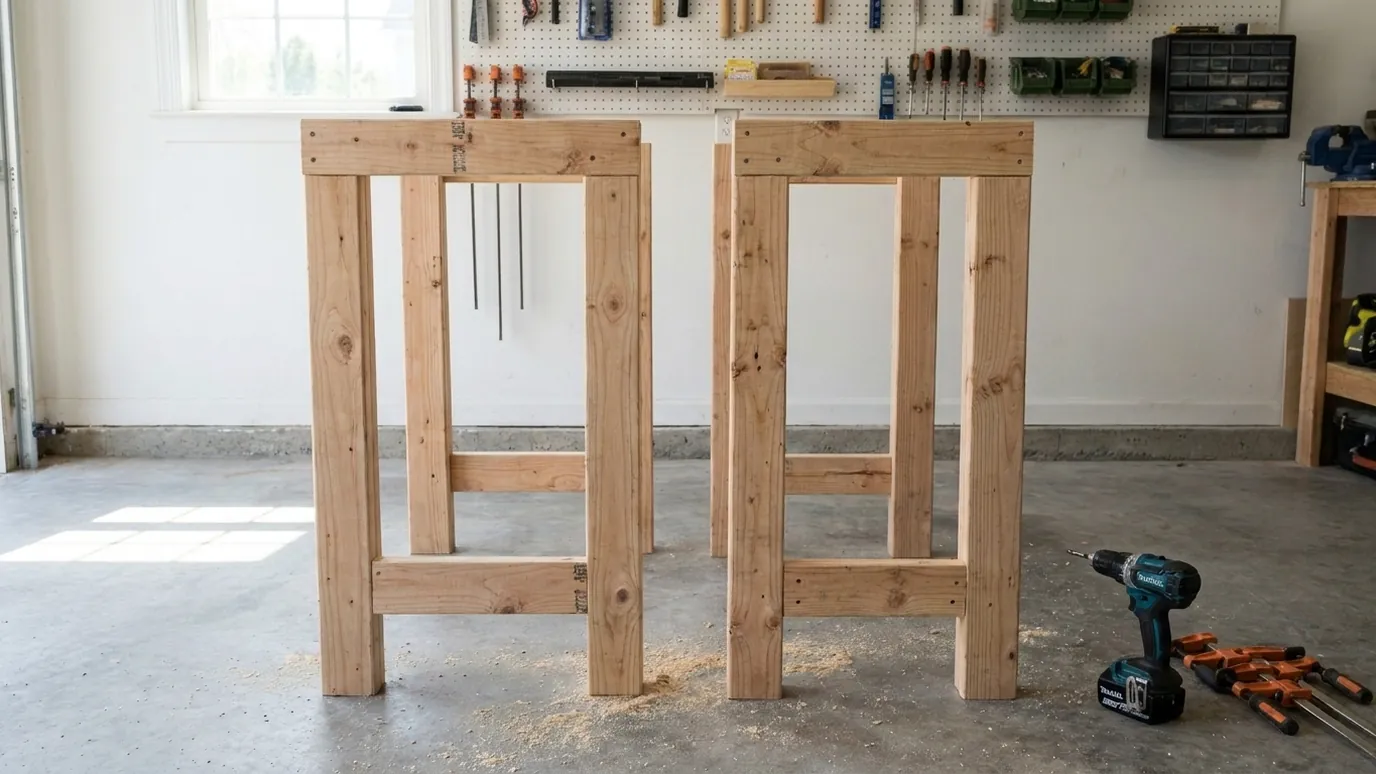
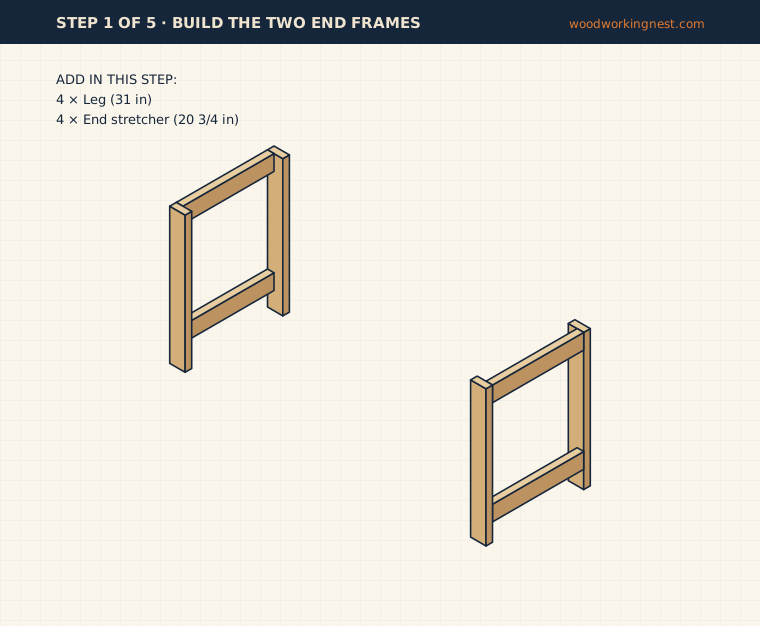
Tip: A 4 in scrap block under each lower stretcher keeps both frames identical.
Step 2: Join the frames with the long aprons
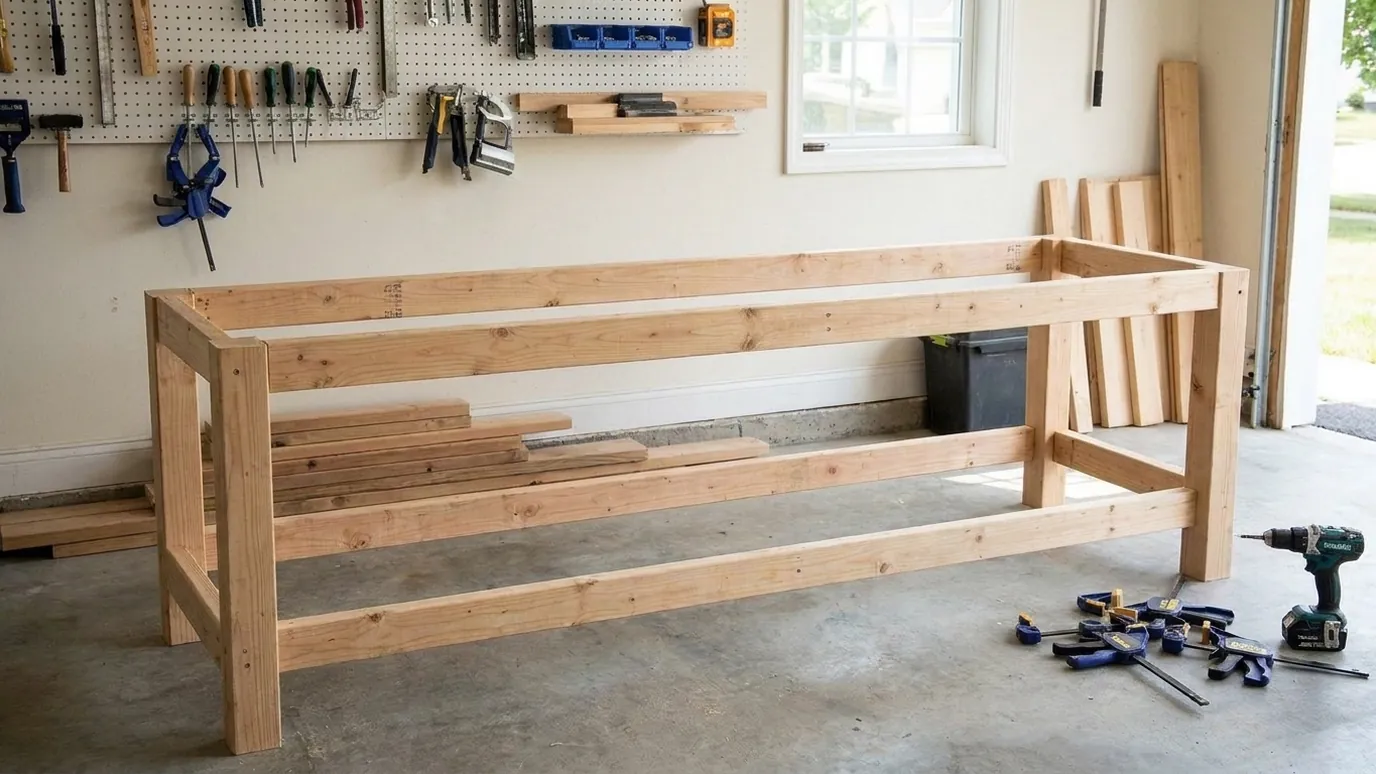
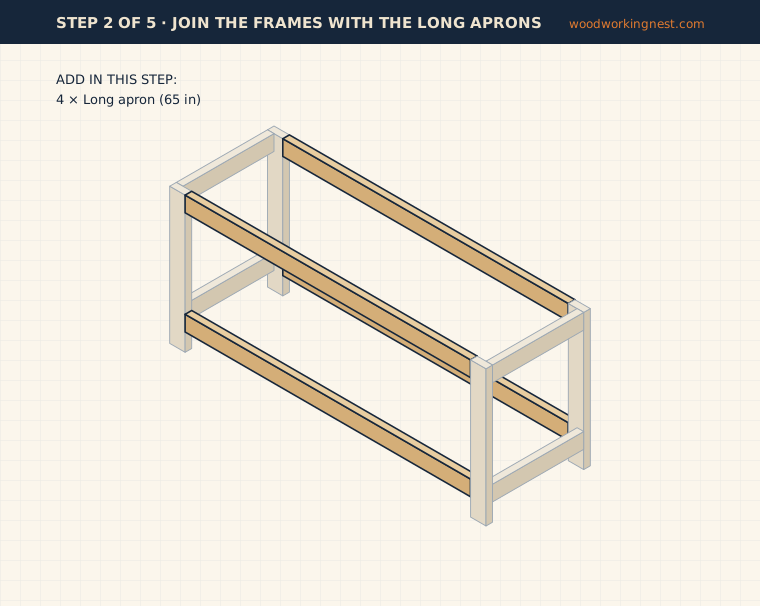
Drill pocket holes in both ends of the four 65 in aprons. Stand the end frames up and clamp a top apron between them at the front, flush with the top and the front face of the legs. Screw it in place, then add the top apron at the back and the two lower aprons, 4 in up from the floor, the same way.
With all four aprons in, measure the top corner to corner both ways and nudge the frame until the numbers match. Set it on the floor where it will live and check that no leg rocks. If your garage floor slopes, it is better to trim one leg now than to fight a twisted station later.
Step 3: Add the center supports
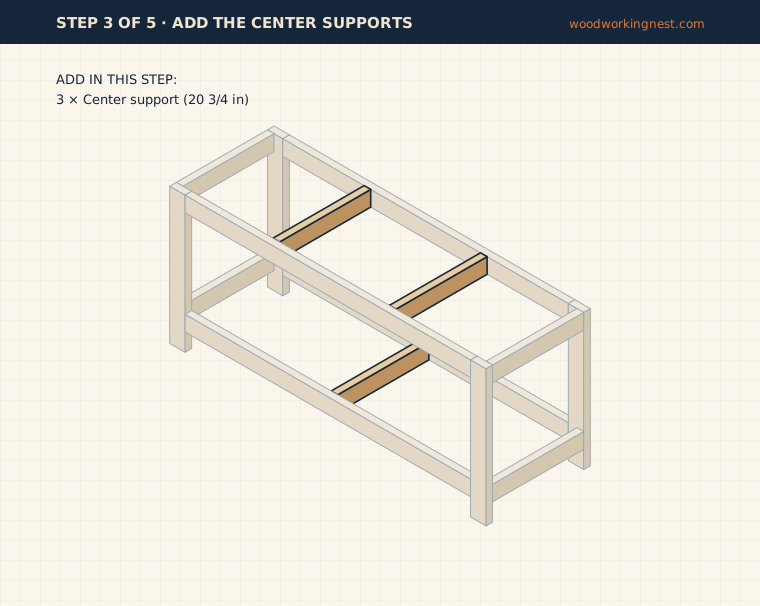
The plywood platform spans 72 in, so it needs support where the heavy saw and the wing frames sit. Mark the top aprons 22 in and 48 1/2 in from the left end, which is right under the inside edge of each wing. Fit a 20 3/4 in center support between the top aprons at each mark, flush with the top edges, and fix it with pocket screws and glue.
Add the third support between the lower aprons, at the middle of the station, to keep the shelf from sagging under clamps and power tools. Run a straightedge across the top frame afterwards. Everything should sit at the same height so the platform lies flat.
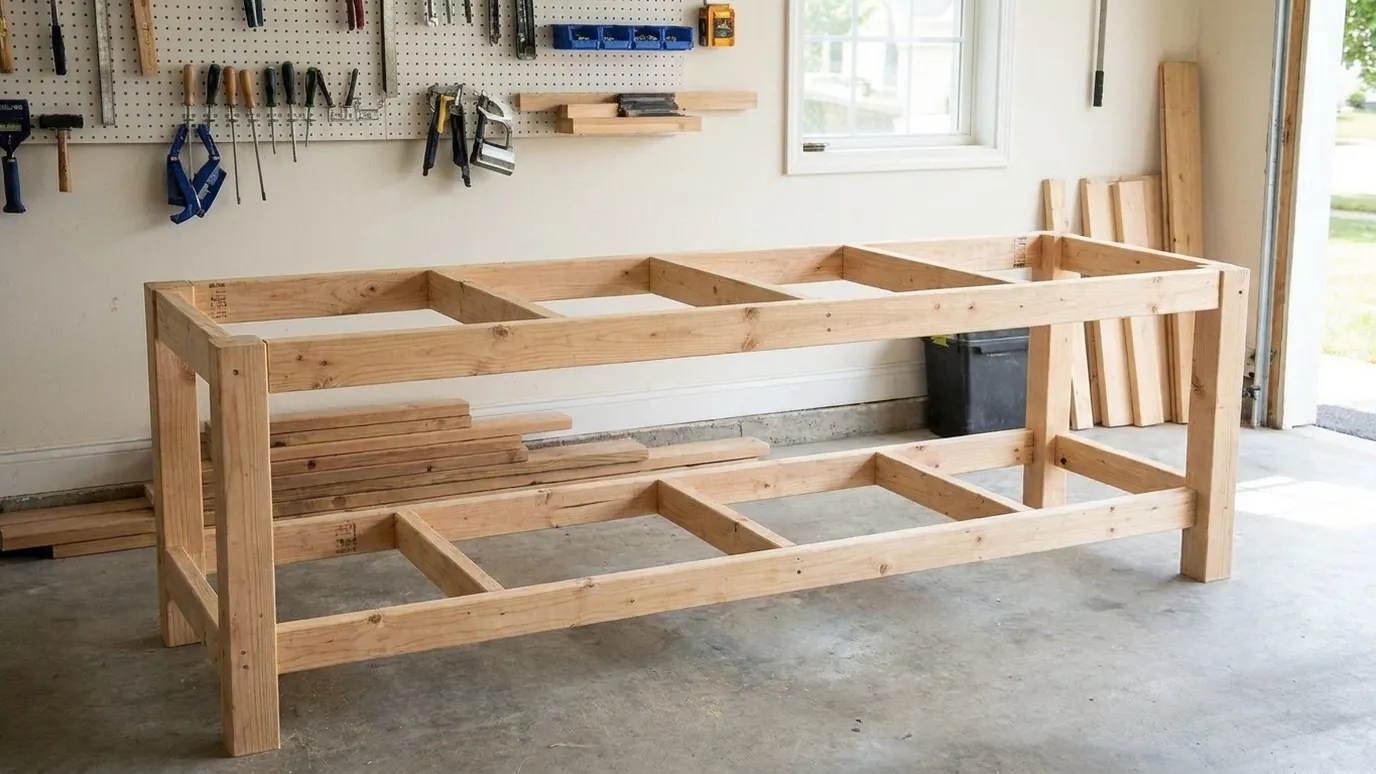
Tip: Mark the support positions on the platform too, so you know where to screw it down.
Step 4: Fit the shelf and the saw platform
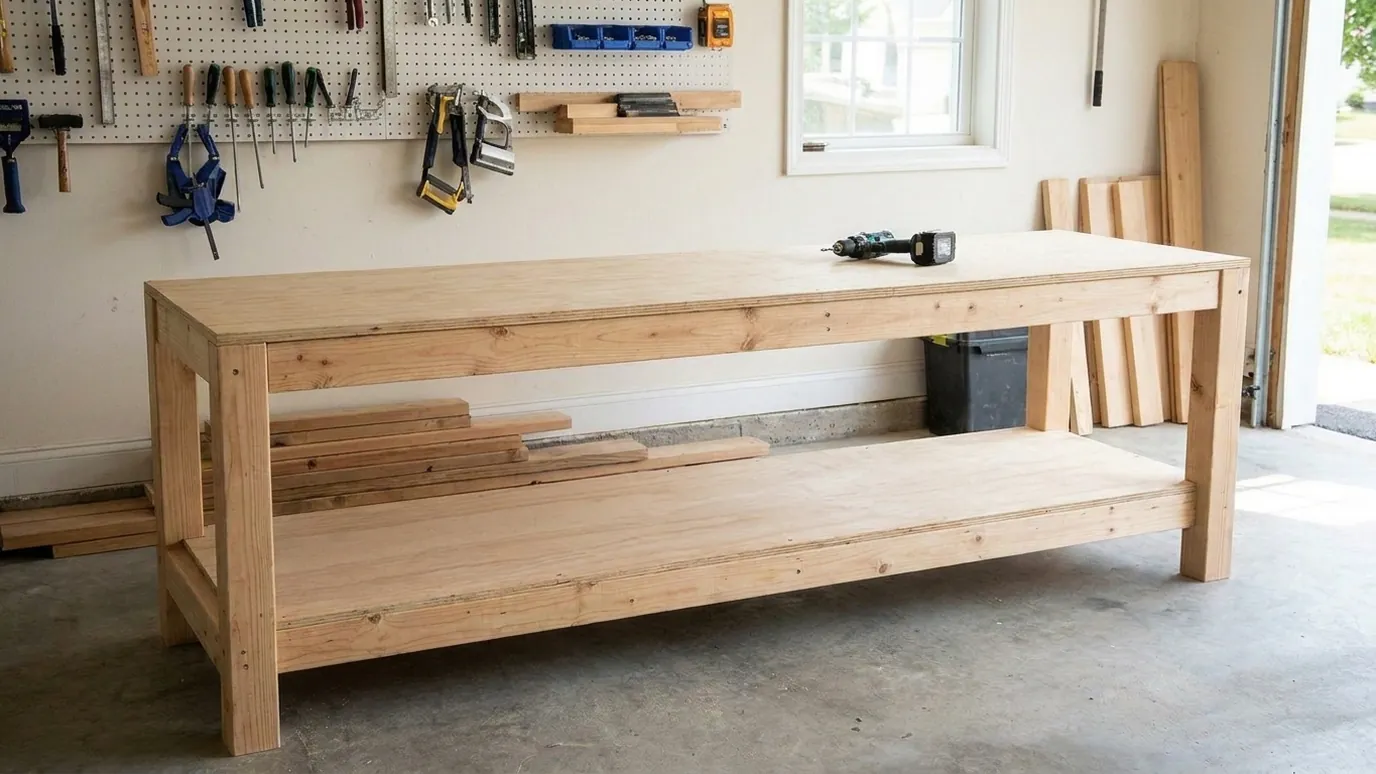
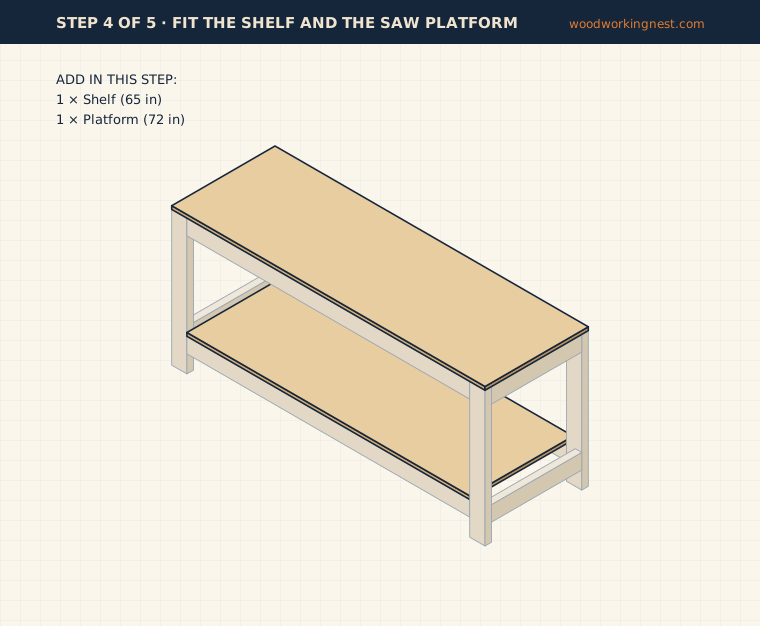
Drop the 65 in shelf onto the lower aprons. It fits between the legs, so no notches are needed. Screw it down to the aprons and the lower center support with 1 1/4 in screws every 8 in. Then lay the 72 in platform on top of the frame, flush with the ends, front and back, and screw it down to the aprons and both upper supports.
Use glue under the platform as well as screws. It turns the top into one stiff panel that resists the vibration of the saw. Countersink every screw head slightly so nothing catches the base of the saw or a board you slide across the top.
Step 5: Build the wings and set the saw height
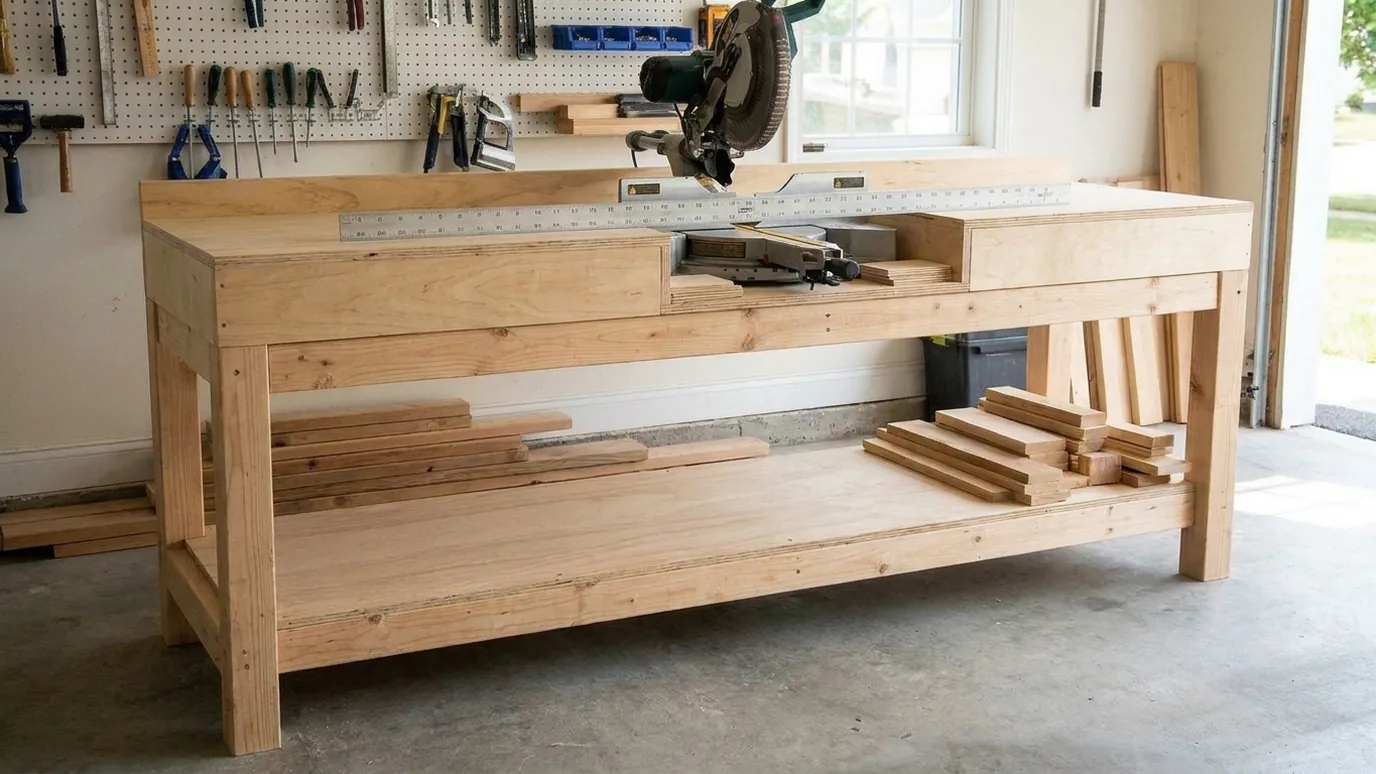
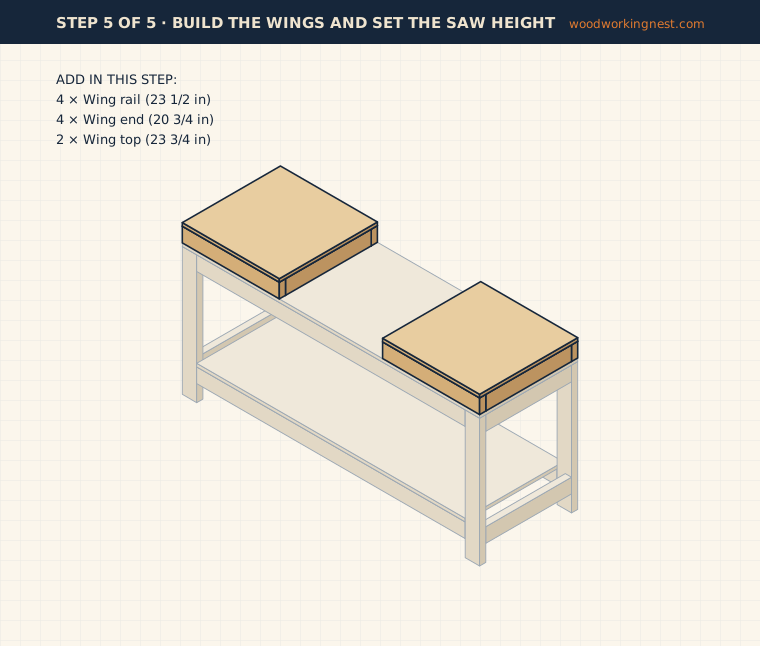
Build each wing as a simple box: two 23 1/2 in rails and two 20 3/4 in ends, all 2x4s standing on edge, screwed together at the corners. Set one box at each end of the platform, flush with the ends, front and back, and screw it down through the platform from above. Glue and screw a 23 1/2 in plywood top onto each box. The wing tops now sit 4 1/4 in above the saw bay.
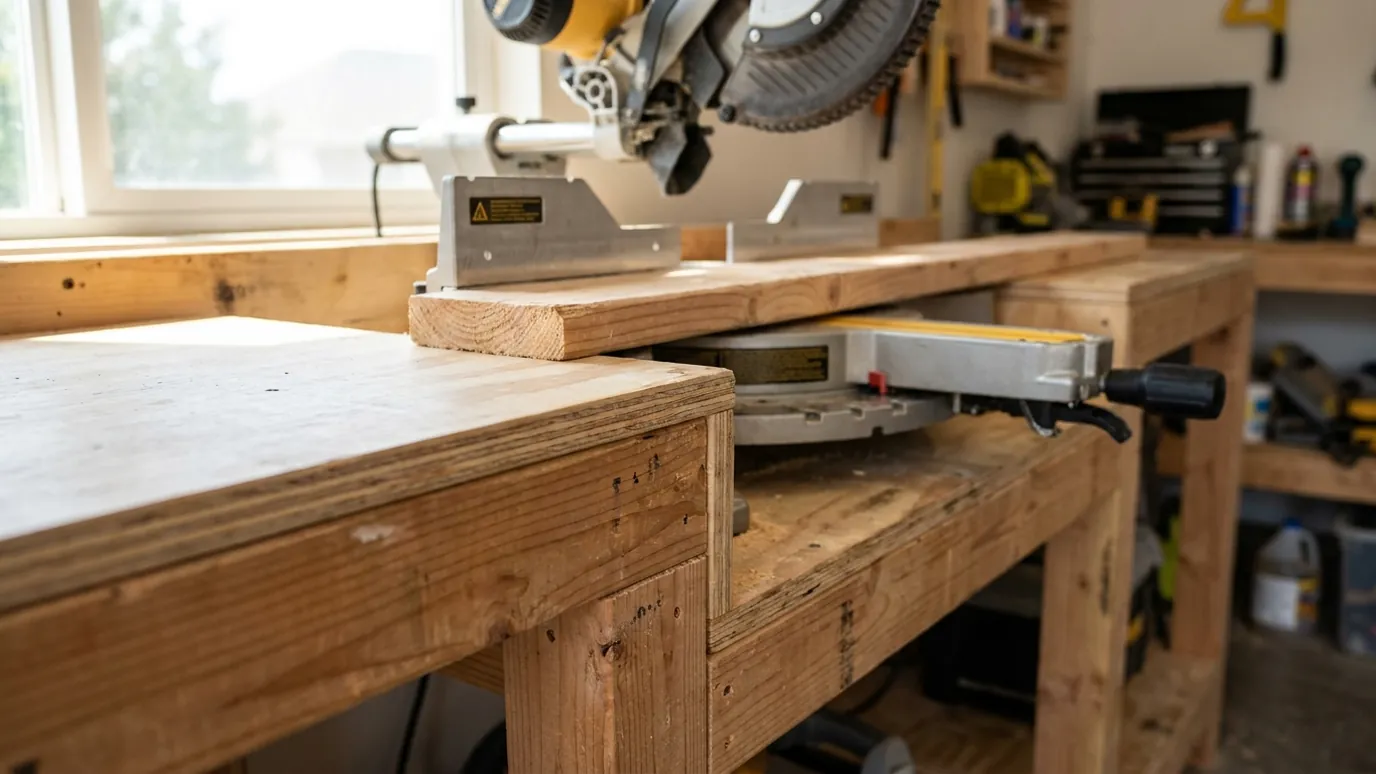
Set the saw in the bay, centered between the wings, and lay a straightedge across both wings over the saw table. Add thin shims under the saw base until the table just touches the straightedge, then bolt or screw the saw down through its mounting holes.
Tip: Check the height at the front and back of the saw table so the saw sits level, not tilted.
Safety: Unplug the saw or remove the battery while you shim and fasten it.
Finishing
A miter saw station does not need a fancy finish, but a coat of wipe-on polyurethane or paste wax on the wing tops helps boards slide and keeps glue and grime from soaking in. Sand any splinters off the plywood edges first. If you like, glue a strip of 1x2 along the back of each wing as a simple fence, lined up exactly with the saw's own fence using a straightedge. A self-stick tape measure along that fence and a clamp-on stop block make repeat cuts much faster.
Common mistakes to avoid
The most common mistake is building the wings before measuring the saw, which leaves the table too high or too low. Measure first, and remember that a wing slightly too high is easy to fix with shims, while a wing too low is not. The second is skipping the center supports, which lets the platform flex every time the saw starts. Finally, do not push a sliding saw tight against the wall; check how far back the rails travel before choosing where the station goes.
How to change the size
To make a longer station for trim work, add length to the platform and the long aprons and make the wings longer; above about 8 ft, add a pair of legs under each wing. For a mobile station, fit four locking casters rated for the weight of the saw and your tools, and shorten the legs by the caster height so the wings stay at 36 in. You can also enclose the shelf with plywood doors, or add drawers under the wings for blades and pencils. For storing the clamps and jigs that end up around the saw, see our workshop plans.
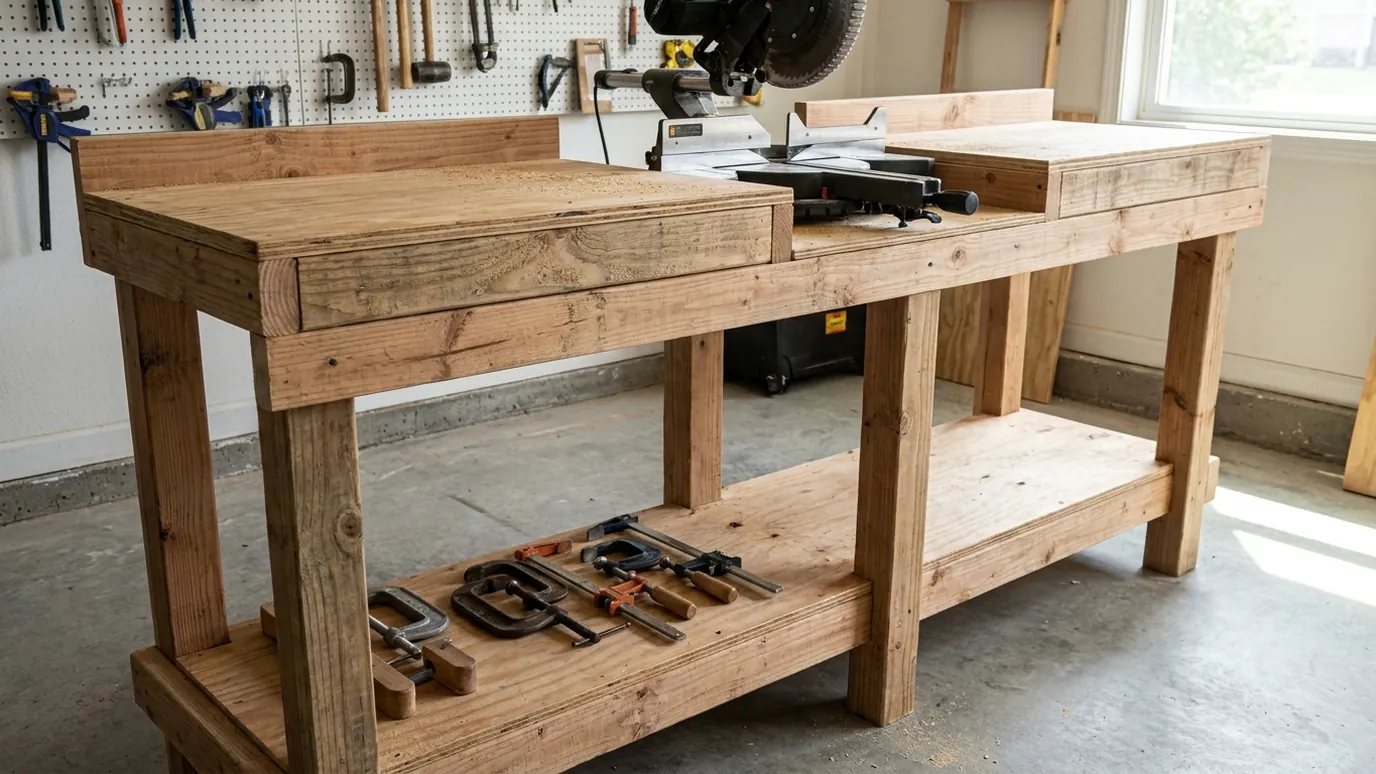
Finished miter saw station photos
Safety
Wear safety glasses and hearing protection whenever the saw runs. Keep both hands well away from the blade and use clamps for short pieces. Make sure long boards are supported on both sides before you cut, so the offcut cannot drop and pinch the blade. Bolt the saw down; a loose saw can walk under load. These plans do not include a load rating. Read our woodworking safety guide before you start.
Frequently asked questions
Will these miter saw station plans fit my saw?
They fit most 10 in and 12 in miter saws. The saw bay is 25 in wide and 4 1/4 in deep. Measure your saw's base width and the height from its base to the top of its table, then shim the saw so the table lines up with the wings.
How tall should a miter saw stand be?
Most people find a work surface around 36 in (91 cm) comfortable for cutting, which is the height of these wings. Taller people may prefer 38–40 in; lengthen the legs by the difference.
How long should a DIY miter saw stand be?
Six feet is a good minimum for a garage, since it supports a typical 8 ft board on both sides of the blade. If you cut a lot of trim, a longer station of 8–10 ft saves time.
Can I put a miter saw station on wheels?
Yes. Use four locking casters rated for the full weight of the saw and the station, and shorten the legs by the caster height. Lock all four wheels before cutting.
Do I need to bolt the saw down?
Yes. Bolting or screwing the saw through its mounting holes stops it from walking during a cut and keeps the table lined up with the wings.
Can I use this as a regular workbench too?
The wings work well for small assembly jobs and hand tools. For heavy hammering or a vise, a dedicated workbench is better.
Related plans
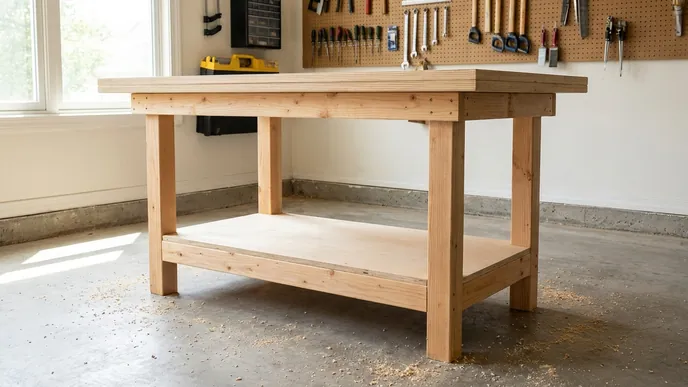
2x4 Workbench Plans: A Sturdy DIY Workbench With a Shelf
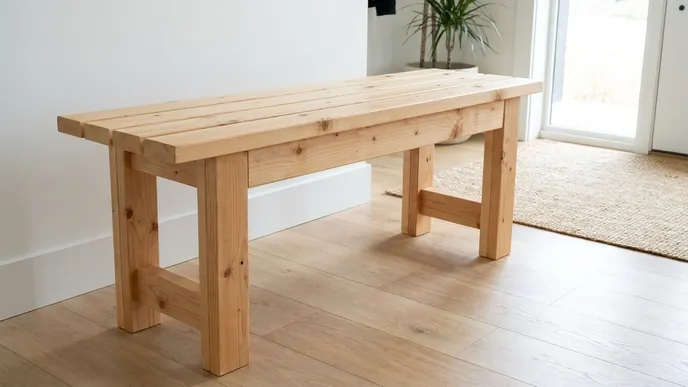
2x4 Bench Plans: Simple DIY Bench for Indoors or Out
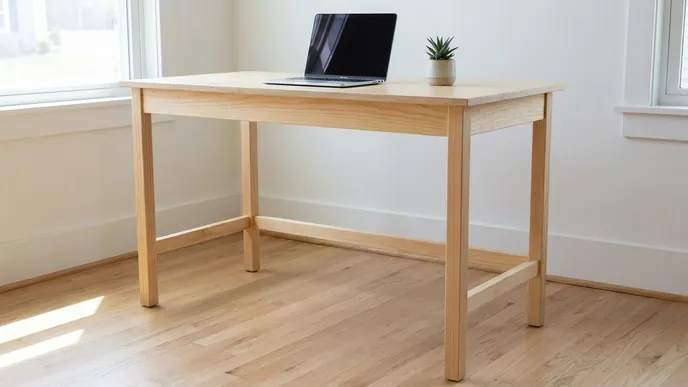
DIY Desk Plans: A Simple Desk You Can Build in a Day
More plans: all workshop plans · every free woodworking plan · board foot calculator
How this plan was made
This plan was designed from a full 3D part model and checked so the cut list, the diagrams and the finished size agree. It has not yet been built and photographed by us. The joinery and sizes follow common, well-tested workbench practice.
 Technically reviewed by Daniel Brooks on . Senior woodworking contributor and technical plan reviewer. He checked the measurements, the materials and the assembly steps.
Written by Woodworking Nest Editors. Measurements, the cut list and all diagrams come from one shared 3D part model, so they always agree. Photos marked “Illustrative render” were created with AI image tools to show the finished look; they are not photos of a real build. Status: Technically reviewed. Found a mistake? Tell us and we will fix it (see our corrections policy).